Artificial Boxwood Accent Wall and DIY Neon Sign
Artificial Boxwood Accent Wall and DIY Neon Sign
The first time I came across an interior artificial boxwood accent wall was at what has now become one of our favorite restaurants in Savannah – The Public Kitchen. One of the dining rooms is completely covered in artificial boxwood with cool industrial lights and exposed brick. It makes for such a unique atmosphere and the food is great too! We’ve eaten here several times now and I can never get the boxwood out of my mind.
Inspiration

{The Public Kitchen – Savannah, GA}
Then I came across the infamous Chicago restaurant, The Hampton Social, on Instagram with its outdoor artificial boxwood accent wall and neon sign. Seeing this sealed the deal and I knew I had to recreate it!
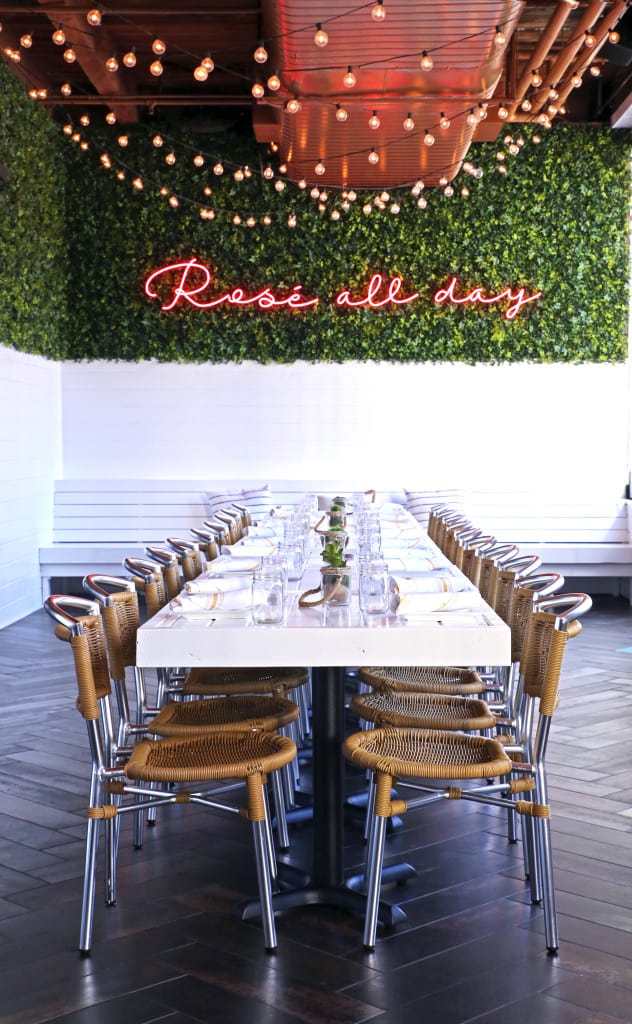
{The Hampton Social – Chicago, IL}
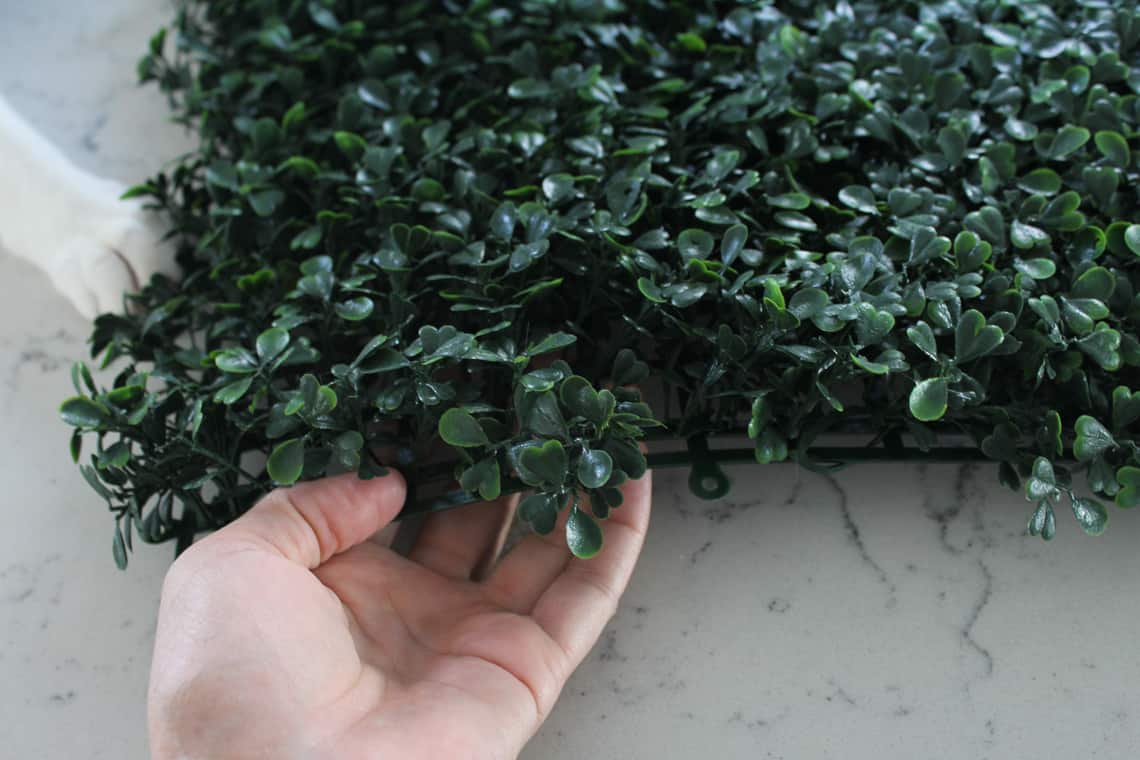
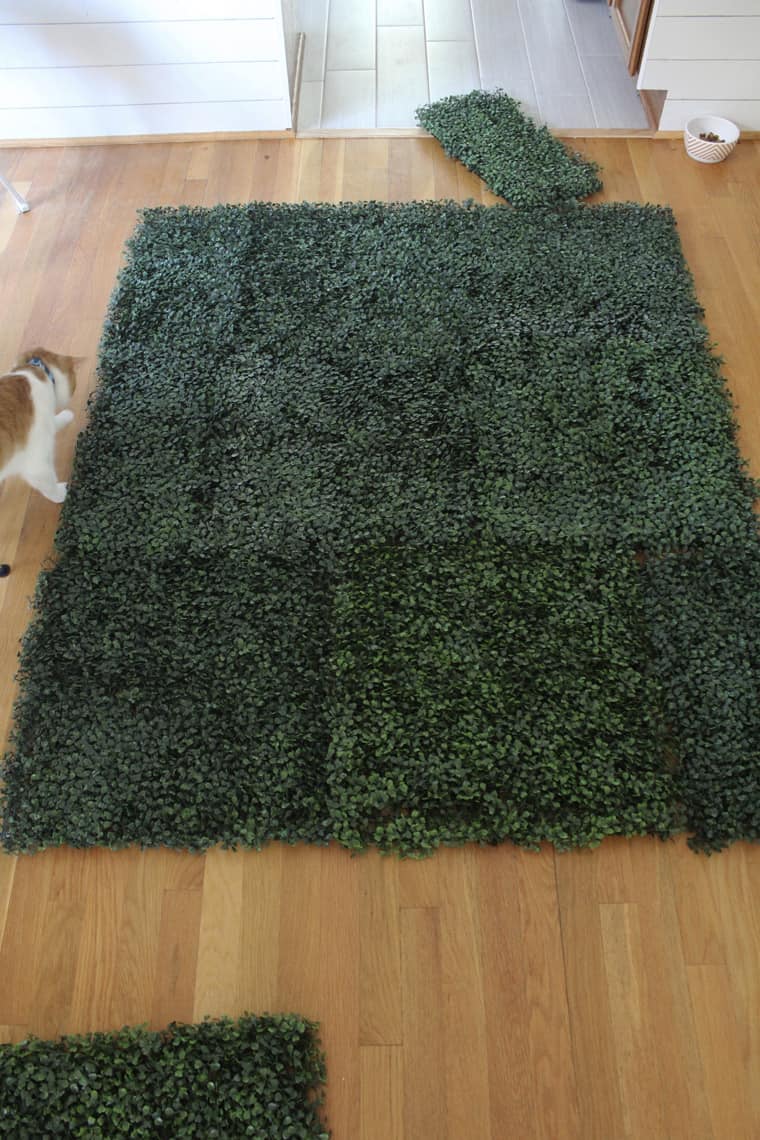
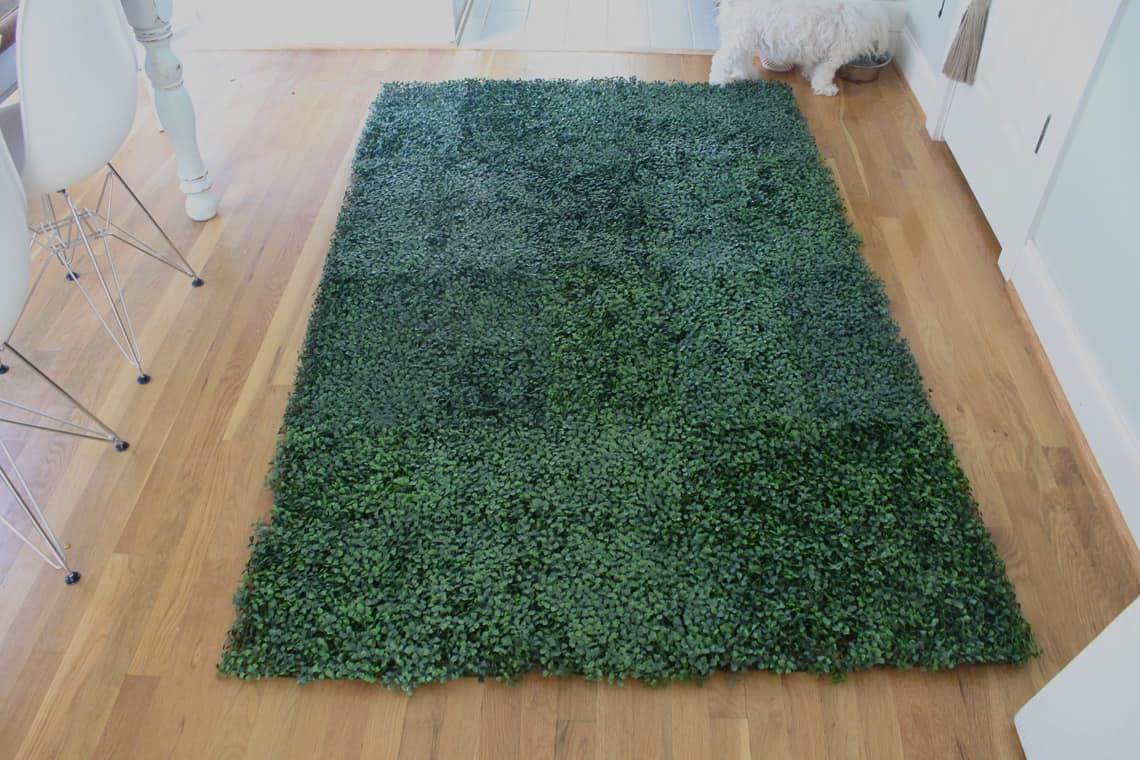
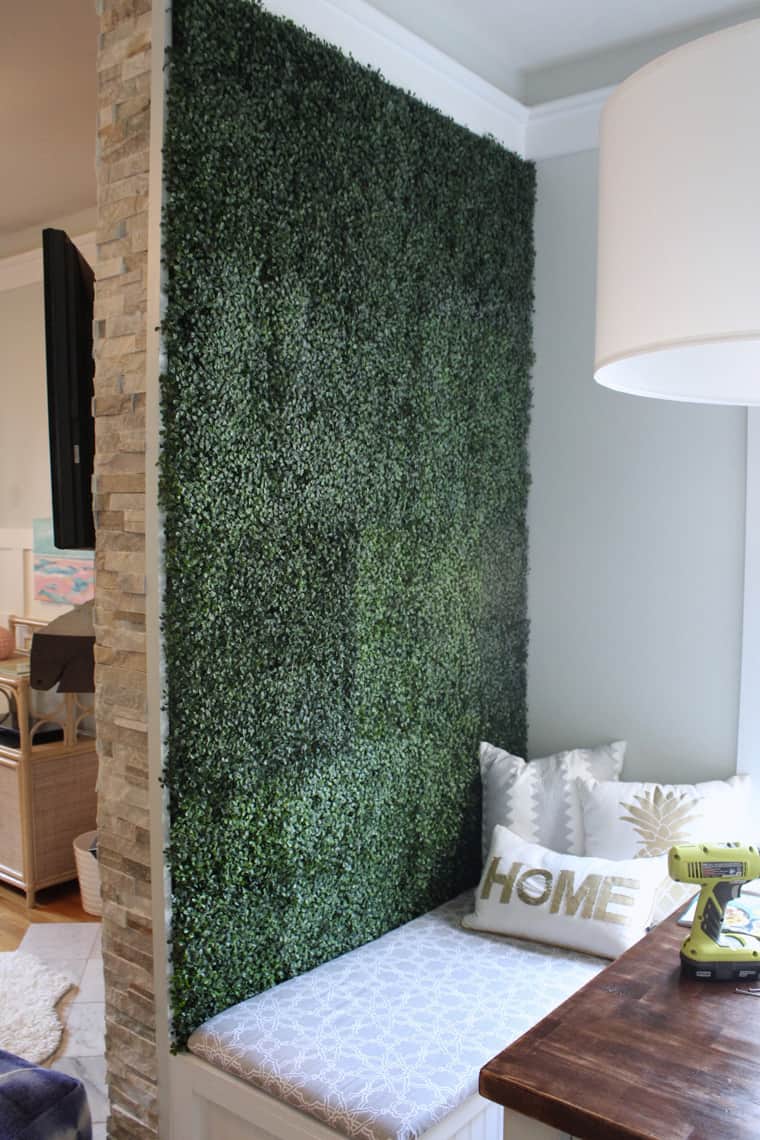
I used these artificial boxwood tiles from Lowe’s that simply snap together. I was lucky in that four of the squares put together was the same width as our accent wall and the height lined up perfectly too. But the tiles can easily be cut with scissors to create any size.
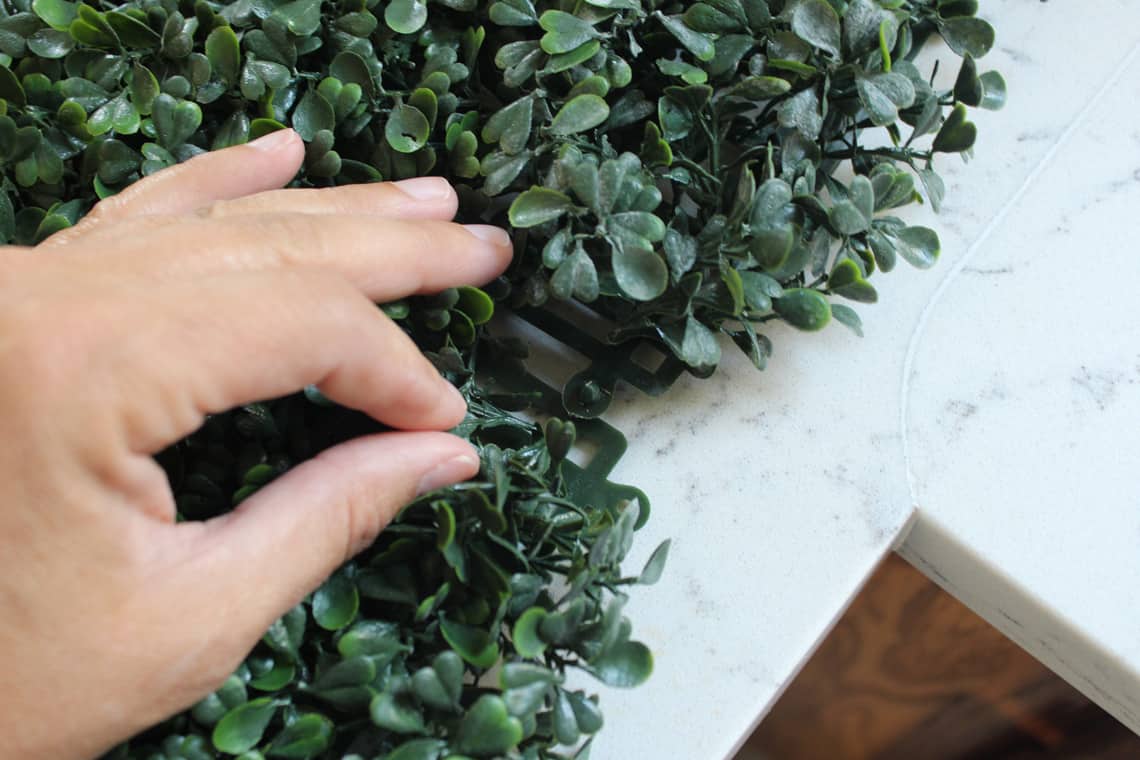
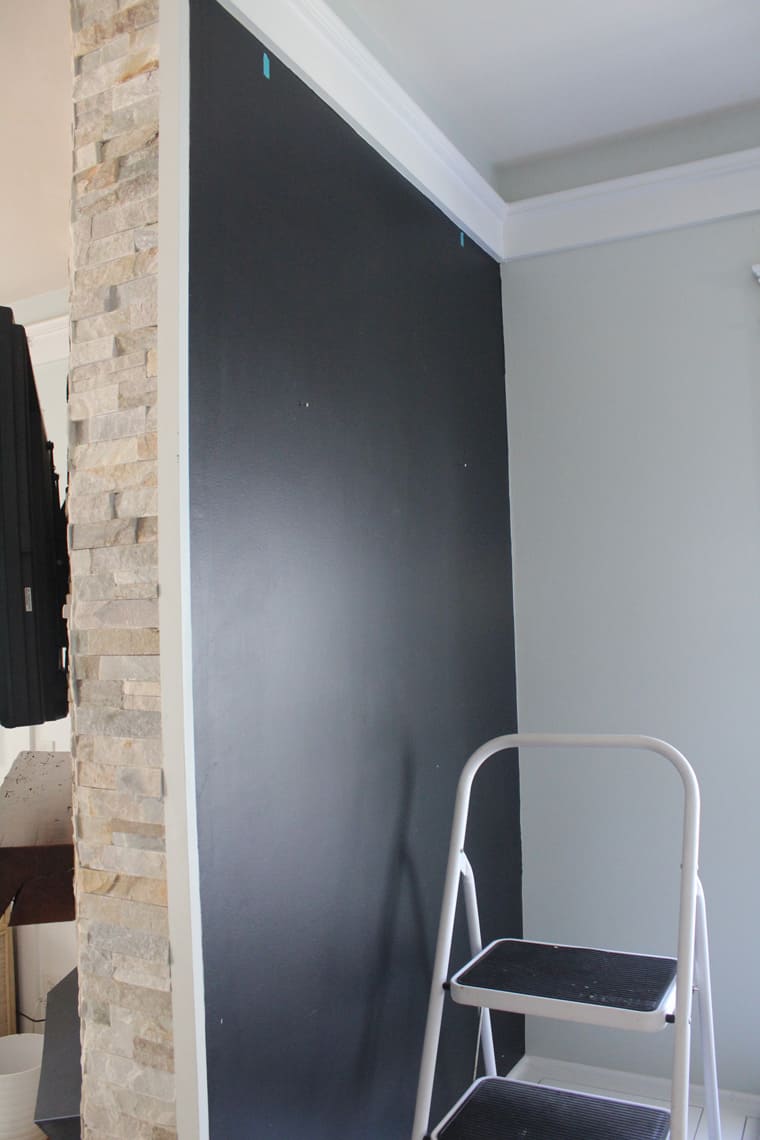
With a stud finder, I found two studs at the top of the wall. Once the tiles were snapped together to cover the wall I attached them by drilling two screws through the tiles and into the studs to hang the boxwood. Once the tiles are all snapped together the sheet of boxwood can get heavy so you will need an extra hand to drill the first screws into the top.
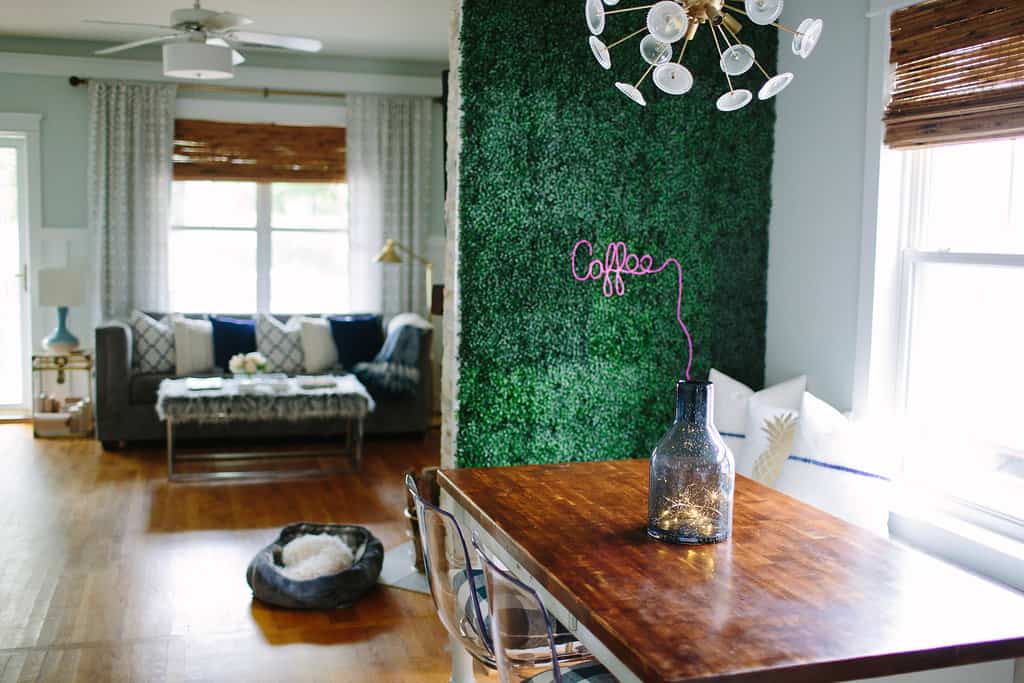
Next I put small screws throughout the inside of the tiles to attach the boxwood to the wall with plenty of support. I simply covered the screws by fluffing the leaves of the boxwood around them. Easy peasy!
The Process + Materials


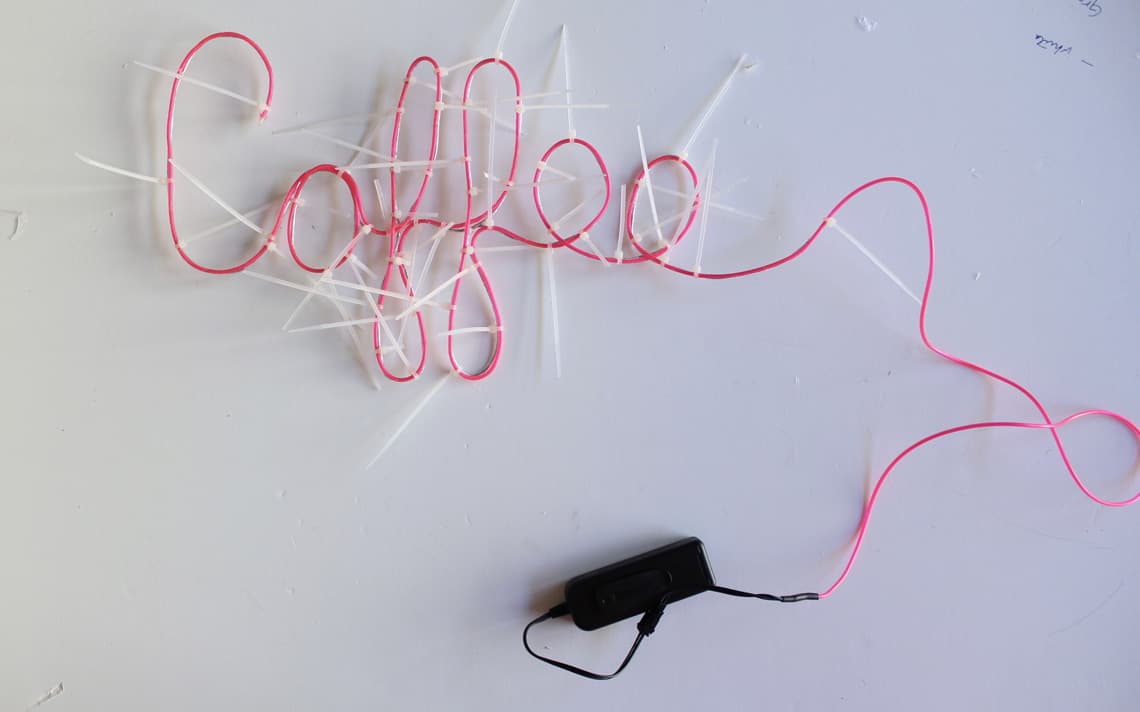
DIY Neon Coffee Sign
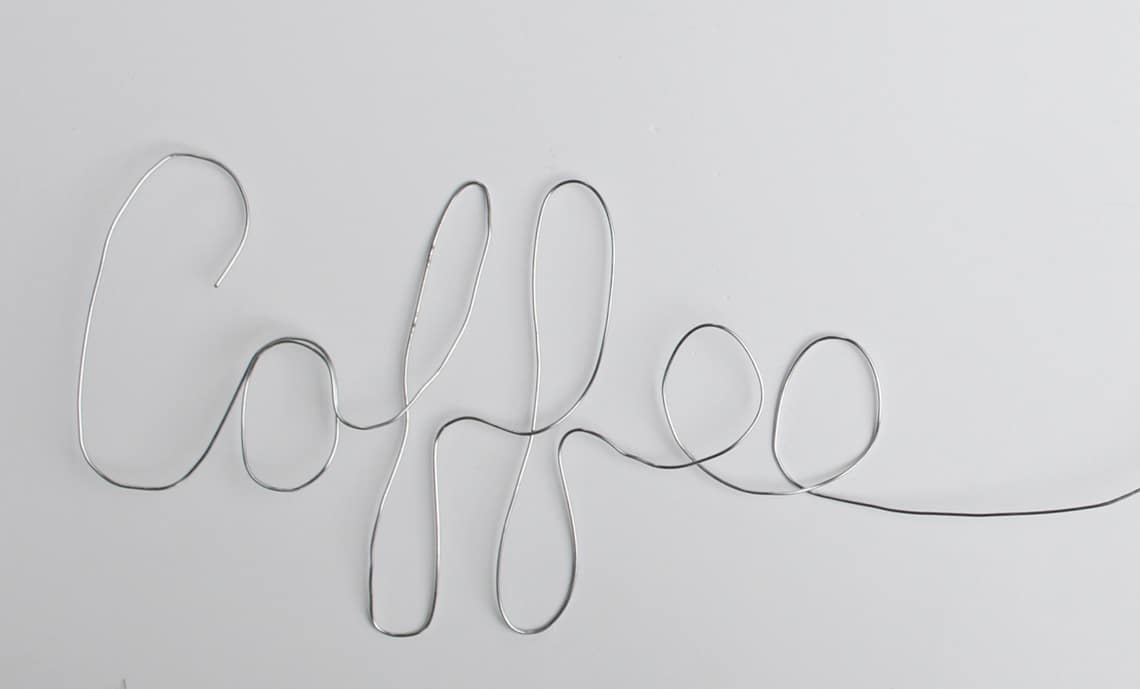
For the neon coffee sign portion of the project, I found and followed this tutorial from I Spy DIY. I followed the tutorial pretty closely, however the binder clips did not work for me for some reason. Instead I put my E6000 adhesive onto the metal wire with Q-tips then I placed the neon wire along the metal wire, little by little, and secured it with small cable ties. Once the glue is dry, carefully snip the cable ties with small, sharpe scissors. The wire was pretty easy to bend into the shape I wanted with just a pair of pliers.
This was an experiment as any first-time DIY is, and I had lots of ideas for different phrases to use for the sign but I didn’t have quite enough neon wire. Oops! Coffee is one of the most important words in my vocabulary so it was a no brainer. I have to say I kinda love it!
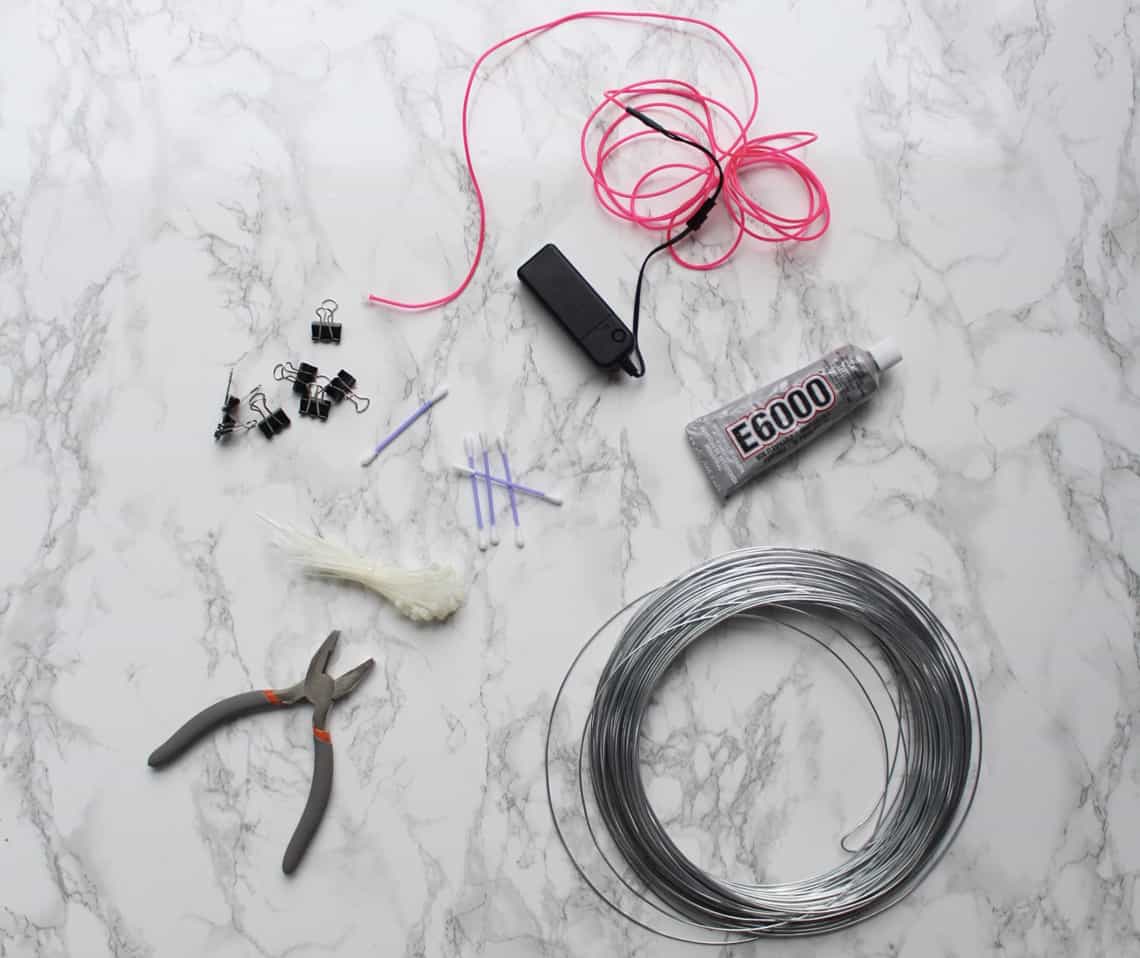
Materials For The Neon Sign
- Neon wire (Note: the battery pack on this wire buzzes slightly but we can’t hear it tucked behind the pillow)
- E6000 adhesive
- 16 gauge wire
- Cable ties
- Q-tips
- Pliers
The Finished Product

{After photos by Paige Winn Photo}
So what do you think? Too far outside the box or is this a fun whimsical accent wall you in attempt in your home? I have realized that I’m just adventurous enough to do it!
Make sure to check out our other DIY Projects!
Cheers!

{This is not a sponsored post, Lowe’s Home Improvement supplied the materials for this project. Thanks to Lowe’s and thank YOU for supporting the brands that make Simple Stylings possible. }
Hey! Can you provide the link for the artificial boxwood tiles from Lowe’s?
Unfortunately I don’t think they sell it anymore. Here is what I see on their site but it says unavailable. https://www.lowes.com/pd/Nearly-Natural-12-in-Green-Artificial-Boxwood/1000176389 This isn’t the brand I bought. You can find it on Amazon and I think this is the brand we used. https://rstyle.me/n/c3hutrbbkif
Such a fun and different idea!
Crazy comes to mind but I’ll take fun and different lol! Thanks Julia :)
Okay I LOVE this and the texture (and fun!) that it brings to the whole space!!!! Way to go, Summer!! #nailedit
Thanks sweet Lady! Miss ya!
OHHH… my goodness!
I LOVE, LOVE, LOVE this! It’s so gorgeous! It’s a little corner of whimsy! <3
Thank you SO much Alex!!!