#ProjectThrowdown with eHow
Happy Thursday friends! Today’s post has challenged my creativity skills on a whole new level and I can’t wait for you to see what I’ve been up to!
I was asked by the eHow team to participate in a DIY project where 6 creators were challenged to make one home decor project using their imagination and four specific materials.
For this #ProjectThrowdown challenge, we were asked us to use:
2. One sonotube
3. Paint, stain or decoupage
4. Chain(s)
When I first accepted the challenge I thought, no big deal, I’ve got this. Then I started brainstorming and researching for what seemed like forever. I mean what the heck is a sonotube??? Clearly I was in over my head :)
Needless to say, I thought, I tried, I failed, I tried again, I failed and finally I came up with an idea that stuck. Honestly I’m not sure how long it will last but I thought the end result was pretty cool!

I can across this site with some amazing vertical planters and it totally inspired me to create a vertical herb garden and planter. Kind of cool, kind of funky.
First I gathered all of the random materials and and cut the sonotube to the size I wanted using a hacksaw. One tube was big enough for the herb garden and planter.


Make the herb garden base:
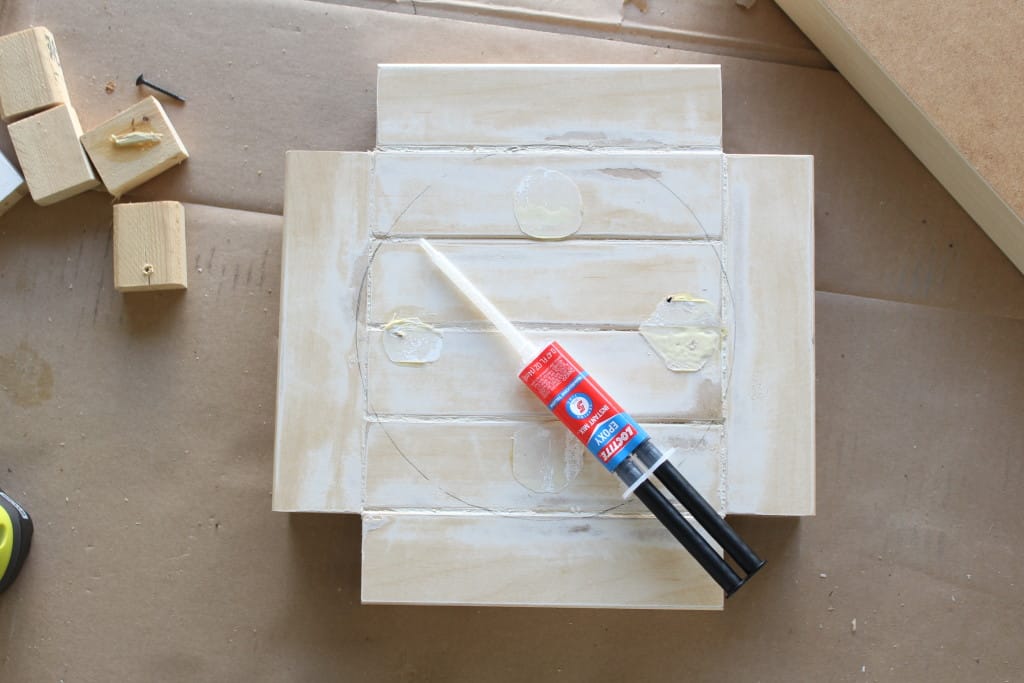
I used the Ikea Lack tabletop to make the base for the herb garden. First I measured and found the center of the tabletop and drew a circle around my tube where I wanted to attach it.
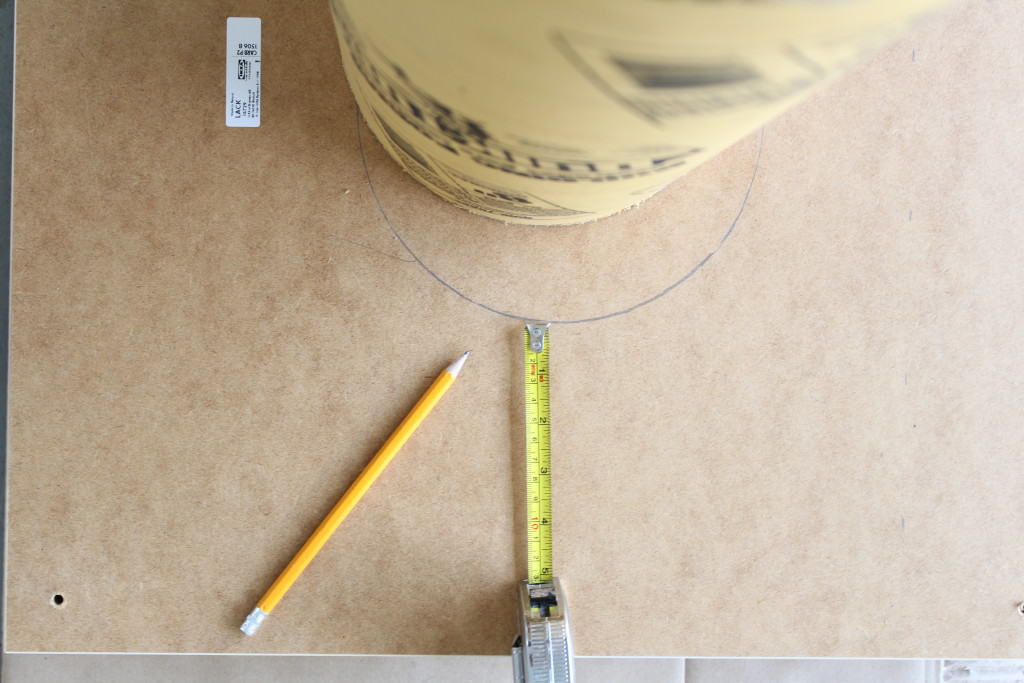
I cut four two-inch pieces of scrap wood and glued and screwed them to the tabletop just inside the lines of my circkle.

Then I placed the sonotube around the wood pieces and screwed it in.
Next I cut six holes into my tube with a small handsaw (not shown). I didn’t measure, I just estimated where I wanted the openings to be. I used a cup to trace the circles.

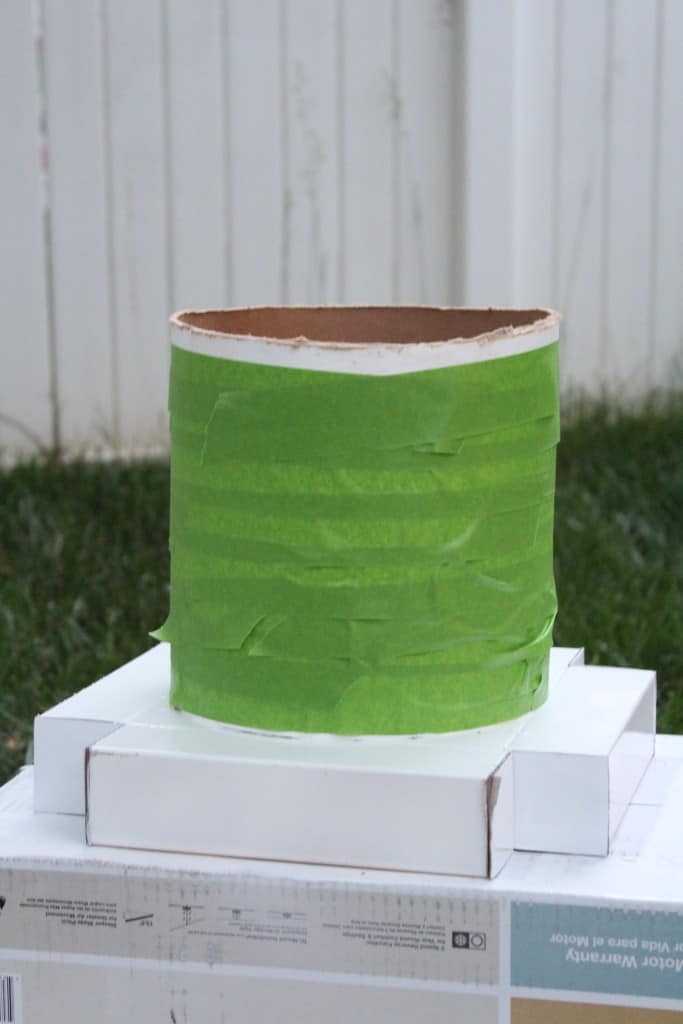
Finally I painted the tube white and the base turquoise, my signature colors of course. Next time I would paint the tube prior to cutting the holes because a little paint did get on the inside of the tube and I prefer not to consume spray paint while using our herbs to cook , oops! :)
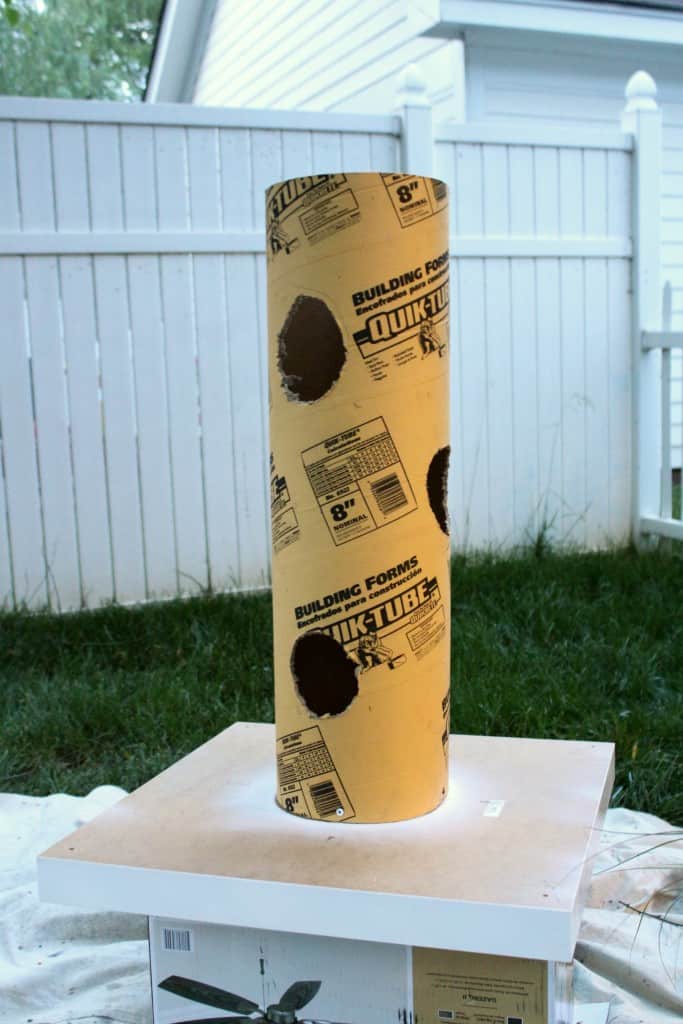
Once the paint was dry I slowly filled the vertical planter with garden soil and placed the herbs into the holes as the tube filled up. I added a jalapeno pepper on top for fun!

Make the planter base:
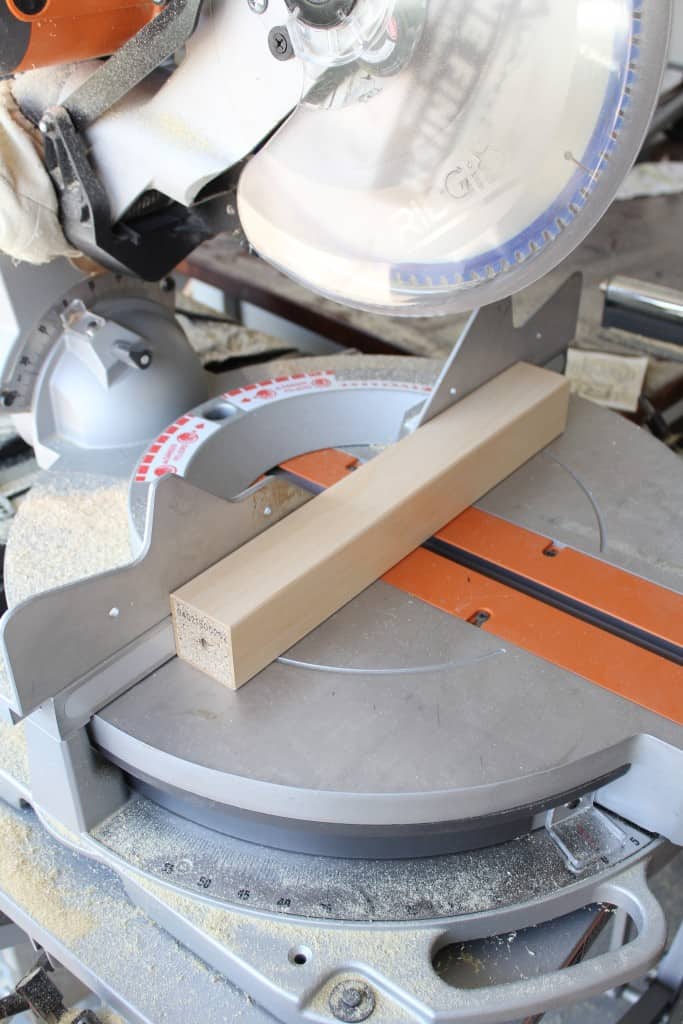
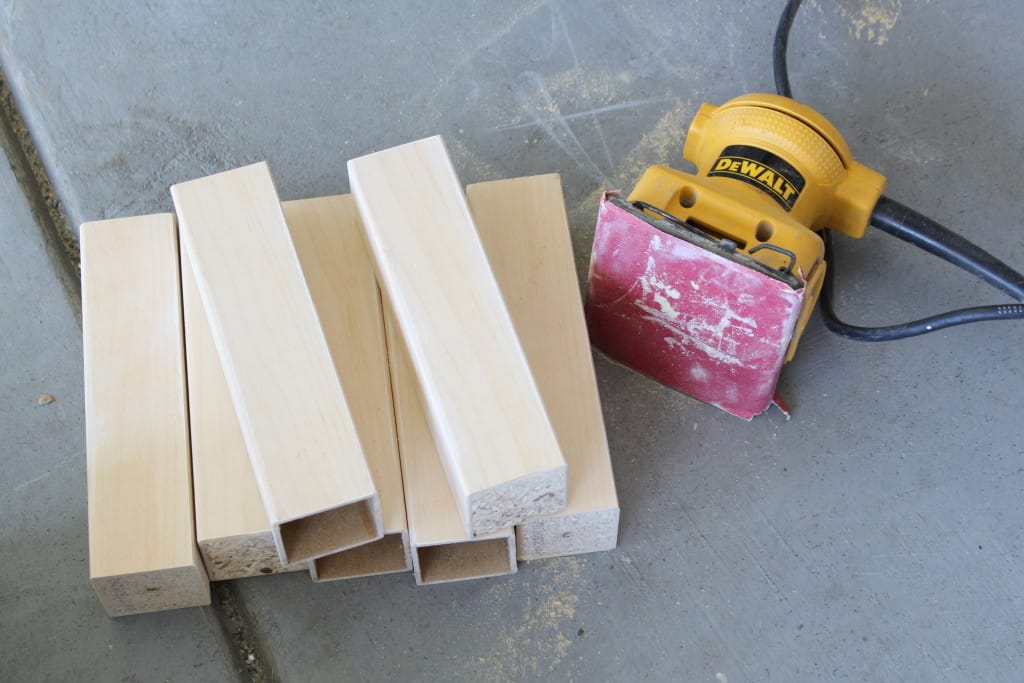
For the planter base I took the legs from the table, measured and cut them in half with my miter saw.
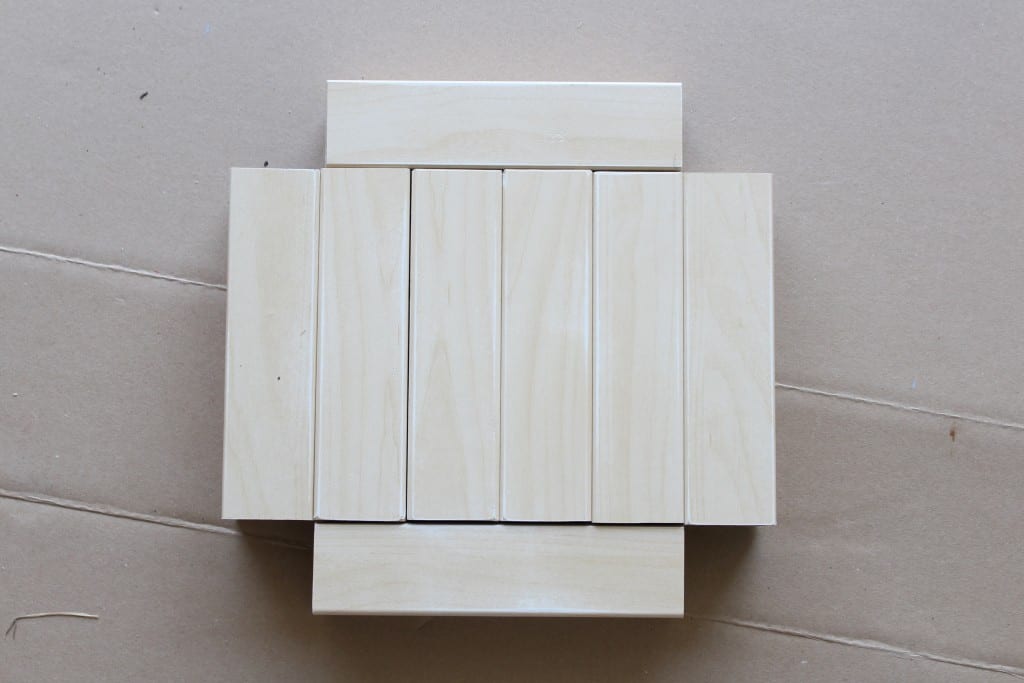
Next I gave them a quick sanding, arranged them and glued them together with wood glue. I used clamps to hold the pieces together while the glue set.

I love Titebond wood glue! If you give it time to dry it holds so well!

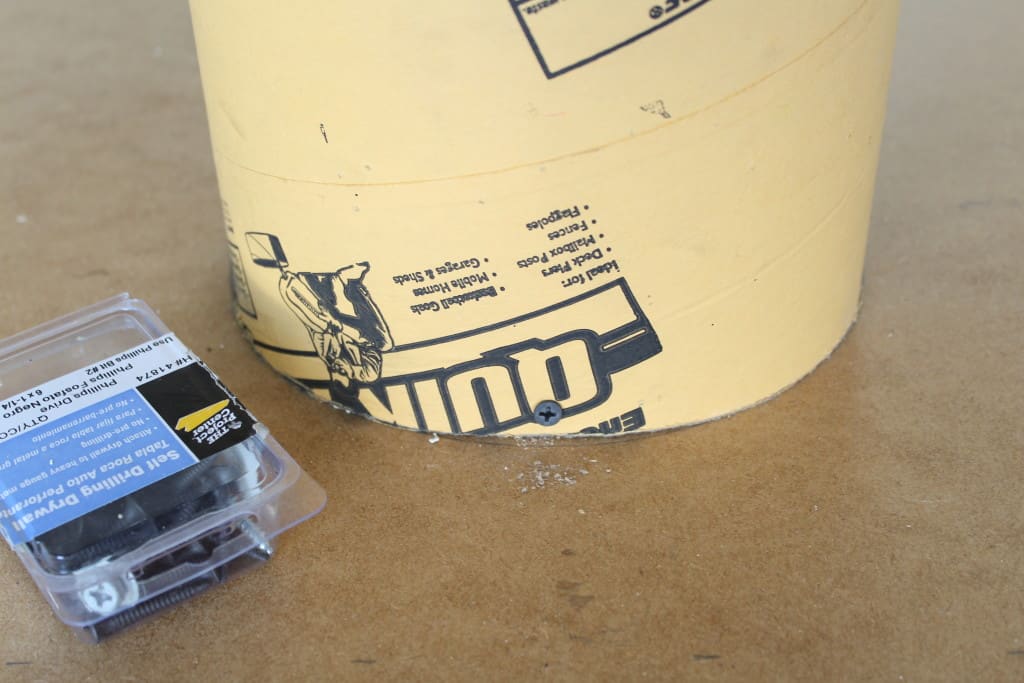
I repeated the same steps as above to find the center of the base and trace the tube.
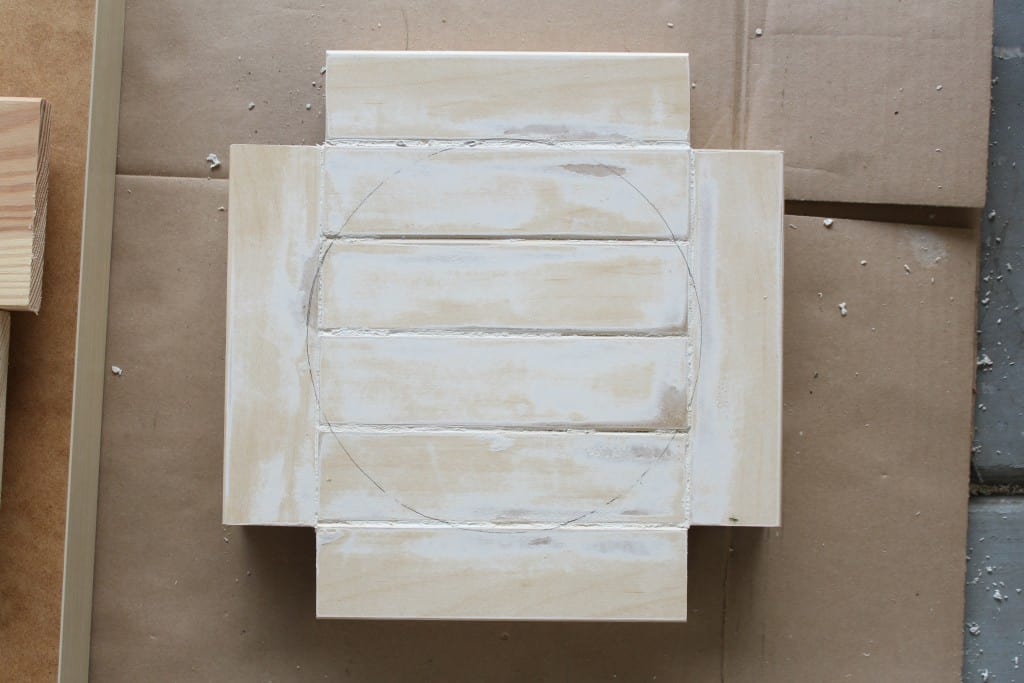
I tried to use the four scrap wood pieces to attached the tube but for some reason they wouldn’t screw into this base very well. I decided to just try gluing the tube to the base with epoxy glue and sure enough it worked like a charm – no screws needed!
Once the glue was dry I spray painted the planter white and the base turquoise. I added a few squares of cardboard with the epoxy glue to the open ends of the table legs on the base. You can hardly notice once it’s all painted.
I found this gorgeous gold chain at Lowe’s and decided to use it as a faux handle on the planter. I figured out the length I needed and pulled the links apart with pliers. I attached them to the planter by drilling a small hole in either side of the tube and inserting the link. I used the pliers to close the link back.

I thought the chain was a cute decorative touch and I’m already scheming ways to use it in some other projects!

Well, I’m real tired now so I think I’m going to go to bed. My creative brain muscles are worn out!
This is a competition so I’d love it if you would pin or share my project! The person with the most pins/regrams wins and will be featured on the eHow homepage and in a dedicated newsletter! Make sure to use the hashtag #ProjectThrowdown!
Make sure to check out all of the projects from the other amazing participants!
- Tim & Mary, 17 Apart
- Jonathan Fong
- Lucy Atkins, Craftbury Bush
- Sara Budisantoso, Hola Sara
- Summer Hogan, Simple Stylings
- Rachel Pereira, Shades of Blue Interiors
The are lots of sales this Memorial Day weekend so come back tomorrow for all the deets! See you on the flip side friends!
Cheers!


Ingenious way to use the legs. I want one of these planters! Great job!
Such a very cool idea!!! Love the added chain for a little bling!
Summer, this is fantastic! And how funny we used the exact same chain and same size of sonitube! I love these vertical planters and that pop of turquoise is so stylish. Great job! Xo