• Skip to primary navigation
  • Skip to main content
  • Skip to primary sidebar
Simple Stylings
  • About
  • Home Decor
  • Travel
  • Recipes
  • Subscribe
menu icon
go to homepage
  • About
  • Home Decor
  • Travel
  • Recipes
  • Subscribe
    • Facebook
    • Instagram
    • Pinterest
    • Twitter
  • subscribe
    search icon
    Homepage link
    • About
    • Home Decor
    • Travel
    • Recipes
    • Subscribe
    • Facebook
    • Instagram
    • Pinterest
    • Twitter
  • ×

    Home » DIY Projects

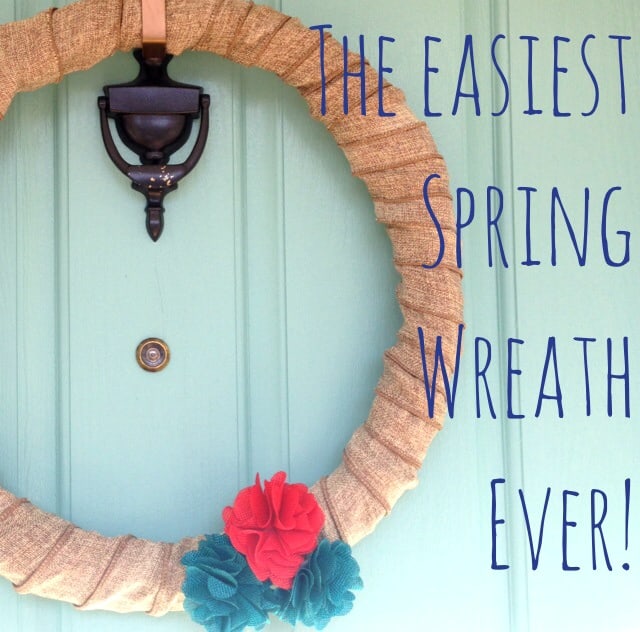
    DIY Easy Spring Wreath with Burlap Ribbon

    Published: Apr 2, 2014 · Modified: Sep 19, 2021 by Simple Stylings · This post may contain affiliate links · 8 Comments

    Good morning and happy Spring FINALLY!!!

    IMG_1480

    We are going to talk about the easiest spring wreath EVER in just a minute but I want to announce the winner of The Exodus Road giveaway from our Wednesday Reads series. And the winner is...

    IMG_1478

    Congratulations are in order for Bette! So Bette go check your inbox and I'll get this gift in the mail to you right away. And thank you so much for being here and reading along!

    Waves

    We don't usually decorate too much for spring around here other than a few fresh flowers but I had a grapevine wreath laying around that I bought from Goodwill for $.99 so I thought I would try my hand at a simple wreath. It's actually so easy that it doesn't even warrant a full tutorial and I forgot to take a before picture of the wreath, oops!

    The wreath I started with was similar to this:
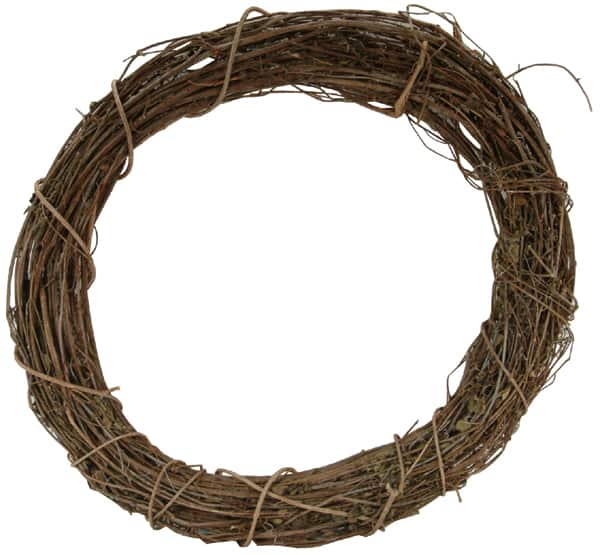
    grapevine wreath

    {via}

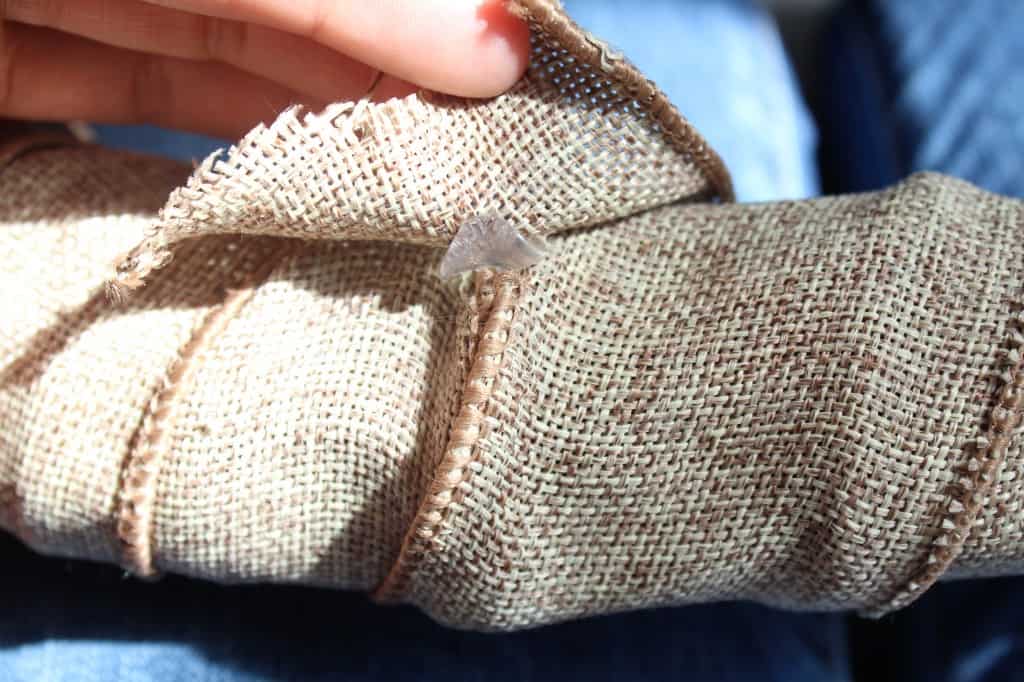
    I had some burlap ribbon leftover from Christmas decorations that I wrapped around the wreath. I was going to use my glue gun to secure the ribbon at each end but I decided to use glue dots instead so I could remove the ribbon easily to use another time.

    IMG_5638

    IMG_5644

    I found these three flowers on clearance at Target for $.50 each so I scooped them up without the wreath in mind at the time. They have a sticky back on them so I stuck them on the wreath in a cluster.

    {Sorry for the horrible pic but I was working at night and using my iPhone :)}

    IMG_5637

    IMG_5645

    IMG_5646

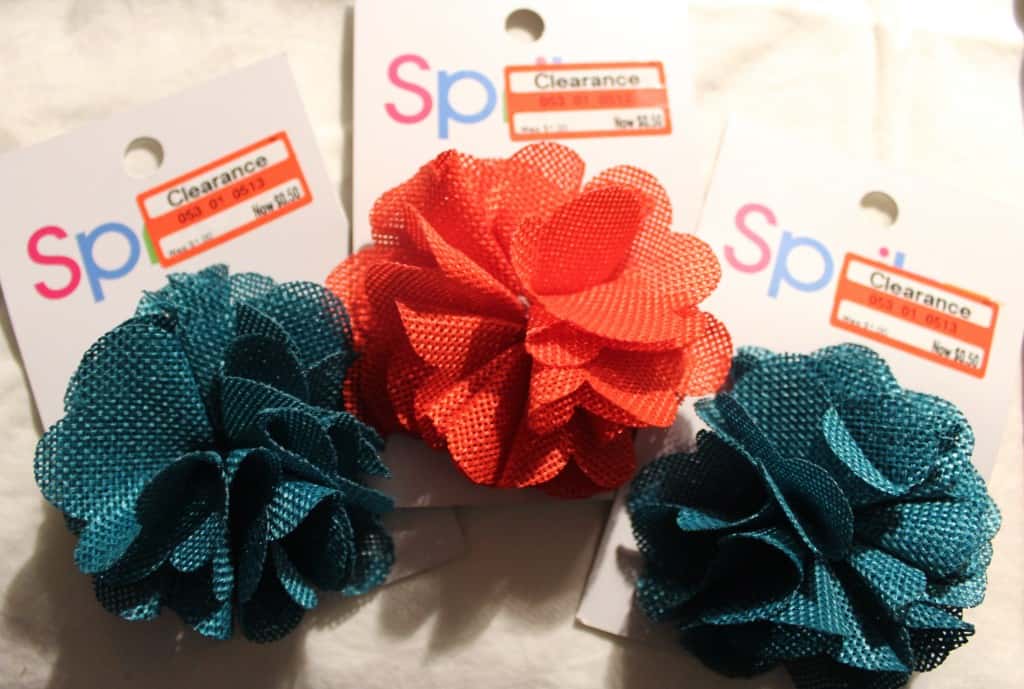
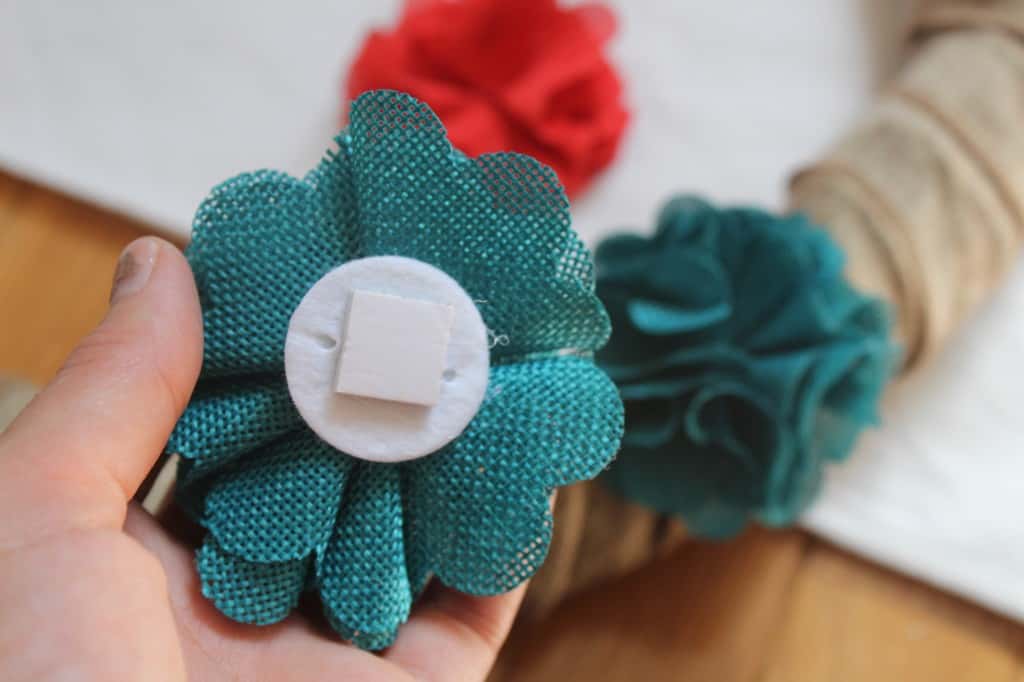
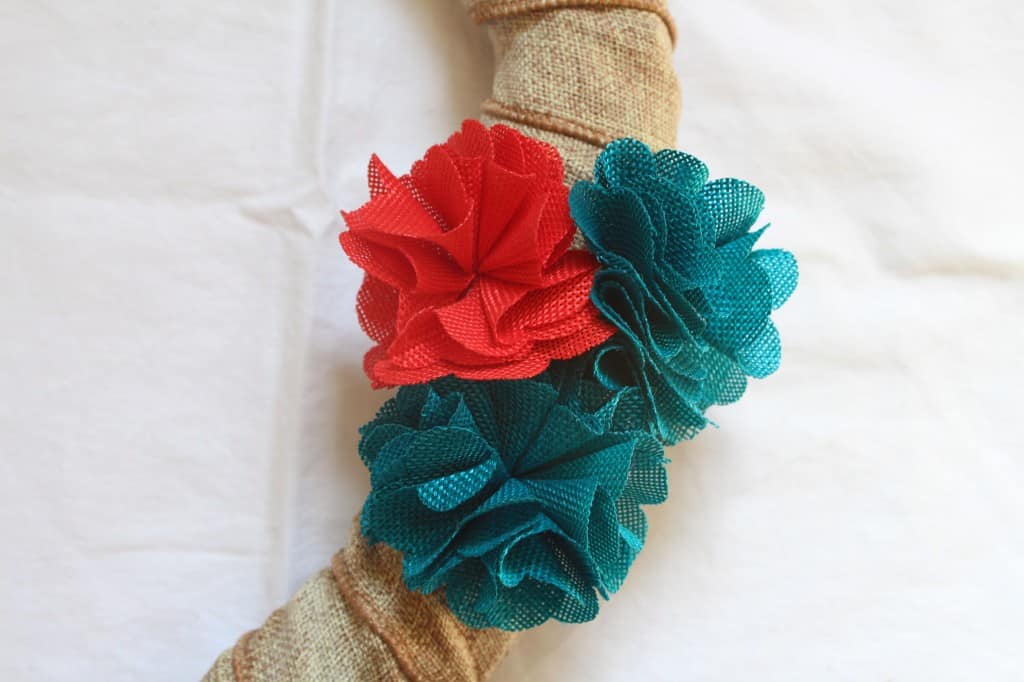
    I doubt the flowers will hold for long with just the sticky back so if need be I will use the glue dots or a dab of hot glue to secure them.
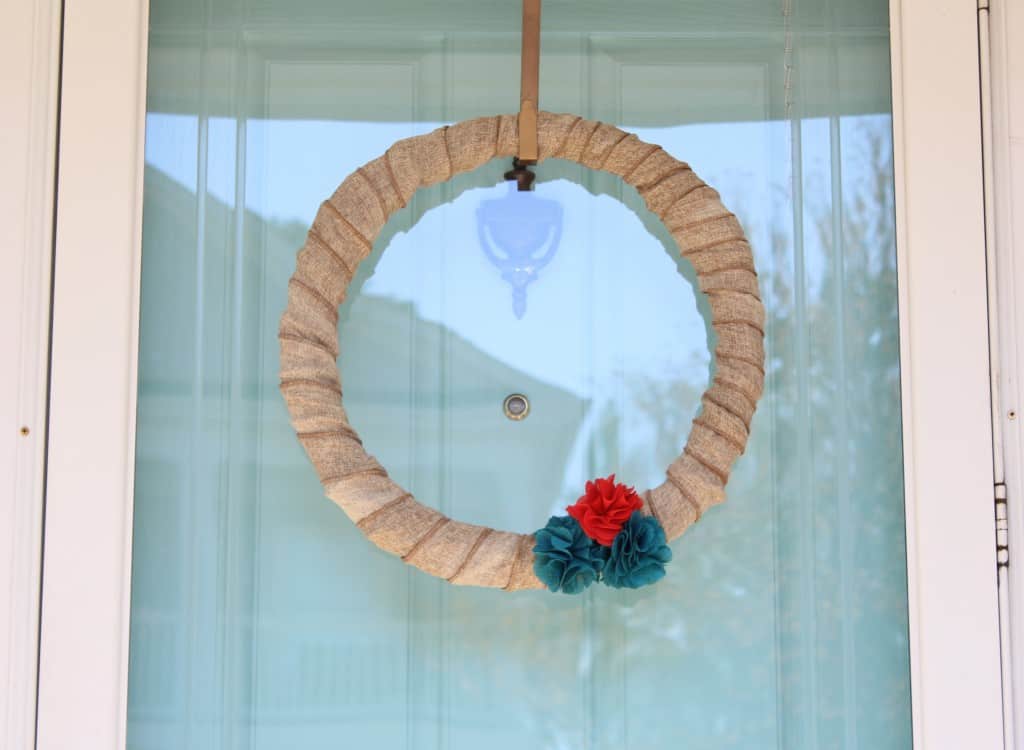
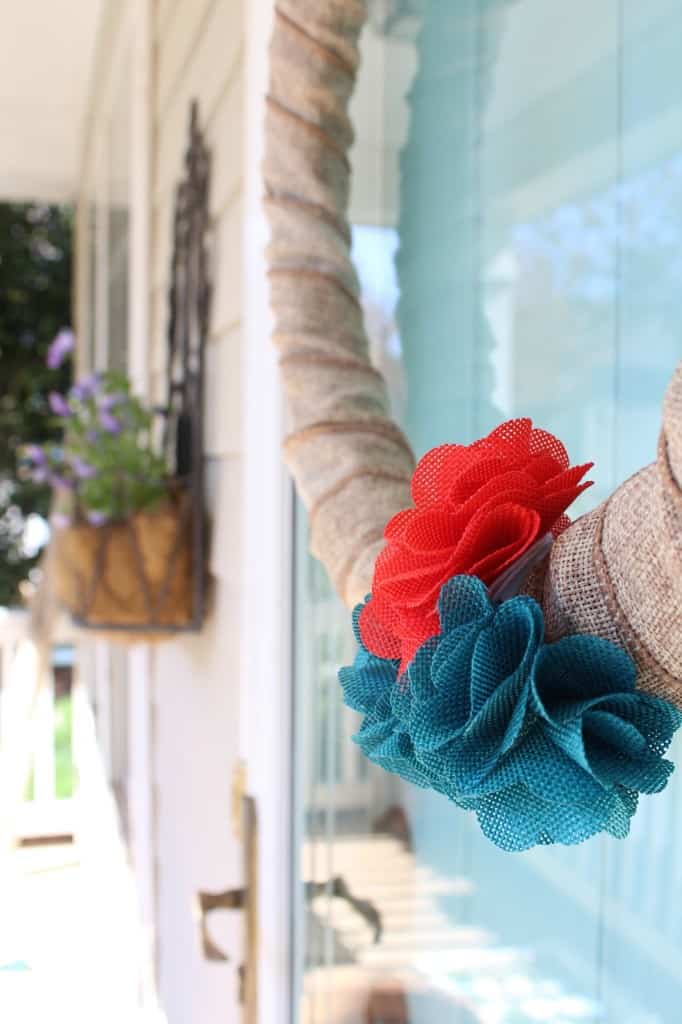
    IMG_5655

    IMG_5650

    For some reason I'm really loving how simple it looks. What do you think, easiest wreath ever?

    Total project cost: $2.49...what?!?!?

    I don't know if it's the season or what but there is so much going on! I'll be back tomorrow for Wednesday Reads and a little announcement on Thursday so stay tuned!

    siggy

    I am linking this post up with The Blissful Bee and several other awesome ladies for the Work it Wednesday link party so don't forget to head on over and check out all the fantastic projects this week!

    workitwednesday

    I am also linking up with Ruth from Living Well Spending Less' Thrifty Thursday and the Liz Marie Blog's Inspire Me Please parties so check out those projects too!

    More DIY Projects

    • Get Your Home Fall Ready
    • Our Updated Tiny Downstairs Bathroom
    • Local Spotlight: Kelly Hovis Designs + A Giveaway
    • Local Spotlight: Hudson Salon + A Gift For You

    Reader Interactions

    Comments

    1. Diane

      July 26, 2017 at 7:14 pm

      This is so neat !!! Love !!!!!

      Reply
      • Simple Stylings

        July 28, 2017 at 7:26 am

        Thank you so much Diane!

        Reply
    2. Mary Claire

      April 03, 2014 at 12:06 am

      Very Nice! I need to go make something like this right now!

      Reply
      • Simple Stylings {For The Semi-Creative Mind}

        April 03, 2014 at 7:08 am

        Thanks so much Mary Claire! It really was easy :)

        Reply
    3. [email protected]

      April 02, 2014 at 4:22 pm

      What $2.49? That's awesome and I would have never guessed that price. So pretty!

      Reply
      • Simple Stylings {For The Semi-Creative Mind}

        April 02, 2014 at 8:11 pm

        Thanks! I already had the ribbon so it was really that cheap but would only have been a little more if I had to buy the ribbon :)

        Reply
    4. Kendra @ www.joyinourhome.com

      April 02, 2014 at 2:11 pm

      Love it, Summer! Like the low cost too.... Also, your front porch is so pretty! Have a fabulous day, friend!

      Reply
      • Simple Stylings {For The Semi-Creative Mind}

        April 02, 2014 at 8:12 pm

        Thanks so much Kendra, you too!

        Reply

    Leave a Reply Cancel reply

    Your email address will not be published. Required fields are marked *

    Recipe Rating


    This site uses Akismet to reduce spam. Learn how your comment data is processed.

    Primary Sidebar

    Hi, I'm Summer! The creator and voice behind the lifestyle blog, Simple Stylings. My goal is to help you create simple style in your home and life. I am passionate about budget decorating, stylish design, travel and healthy living

    More about me →

    Receive our posts in your inbox Subscribe now!

    Popular Posts

    • Easy Pumpkin Swirl Cheesecake
    • Cozy Fall Decorating Ideas + 2 Recipes!
    • Easy Slow Cooker Chili Recipe
    • Cowboy Caviar: An Easy Healthy Snack for Everyone

    Footer

    ↑ back to top

    About

    • Privacy Policy
    • Disclaimer
    • Accessibility Policy

    Newsletter

    • Sign Up! for emails and updates

    Contact

    • Contact
    • Services
    • Press

    As an Amazon Associate I earn from qualifying purchases.

    Copyright © 2023 Simple Stylings