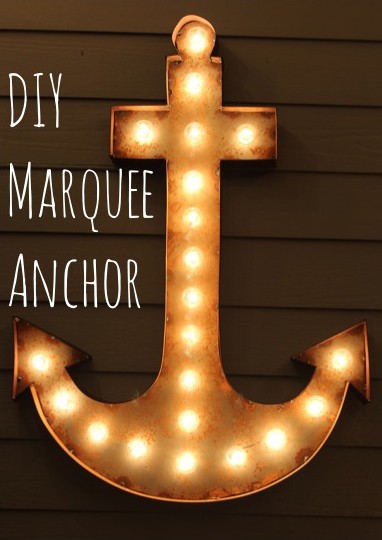
DIY Marquee Anchor Tutorial
Finally it’s here, the moment you’ve all been waiting for. Okay, maybe not y’all but definitely me :)
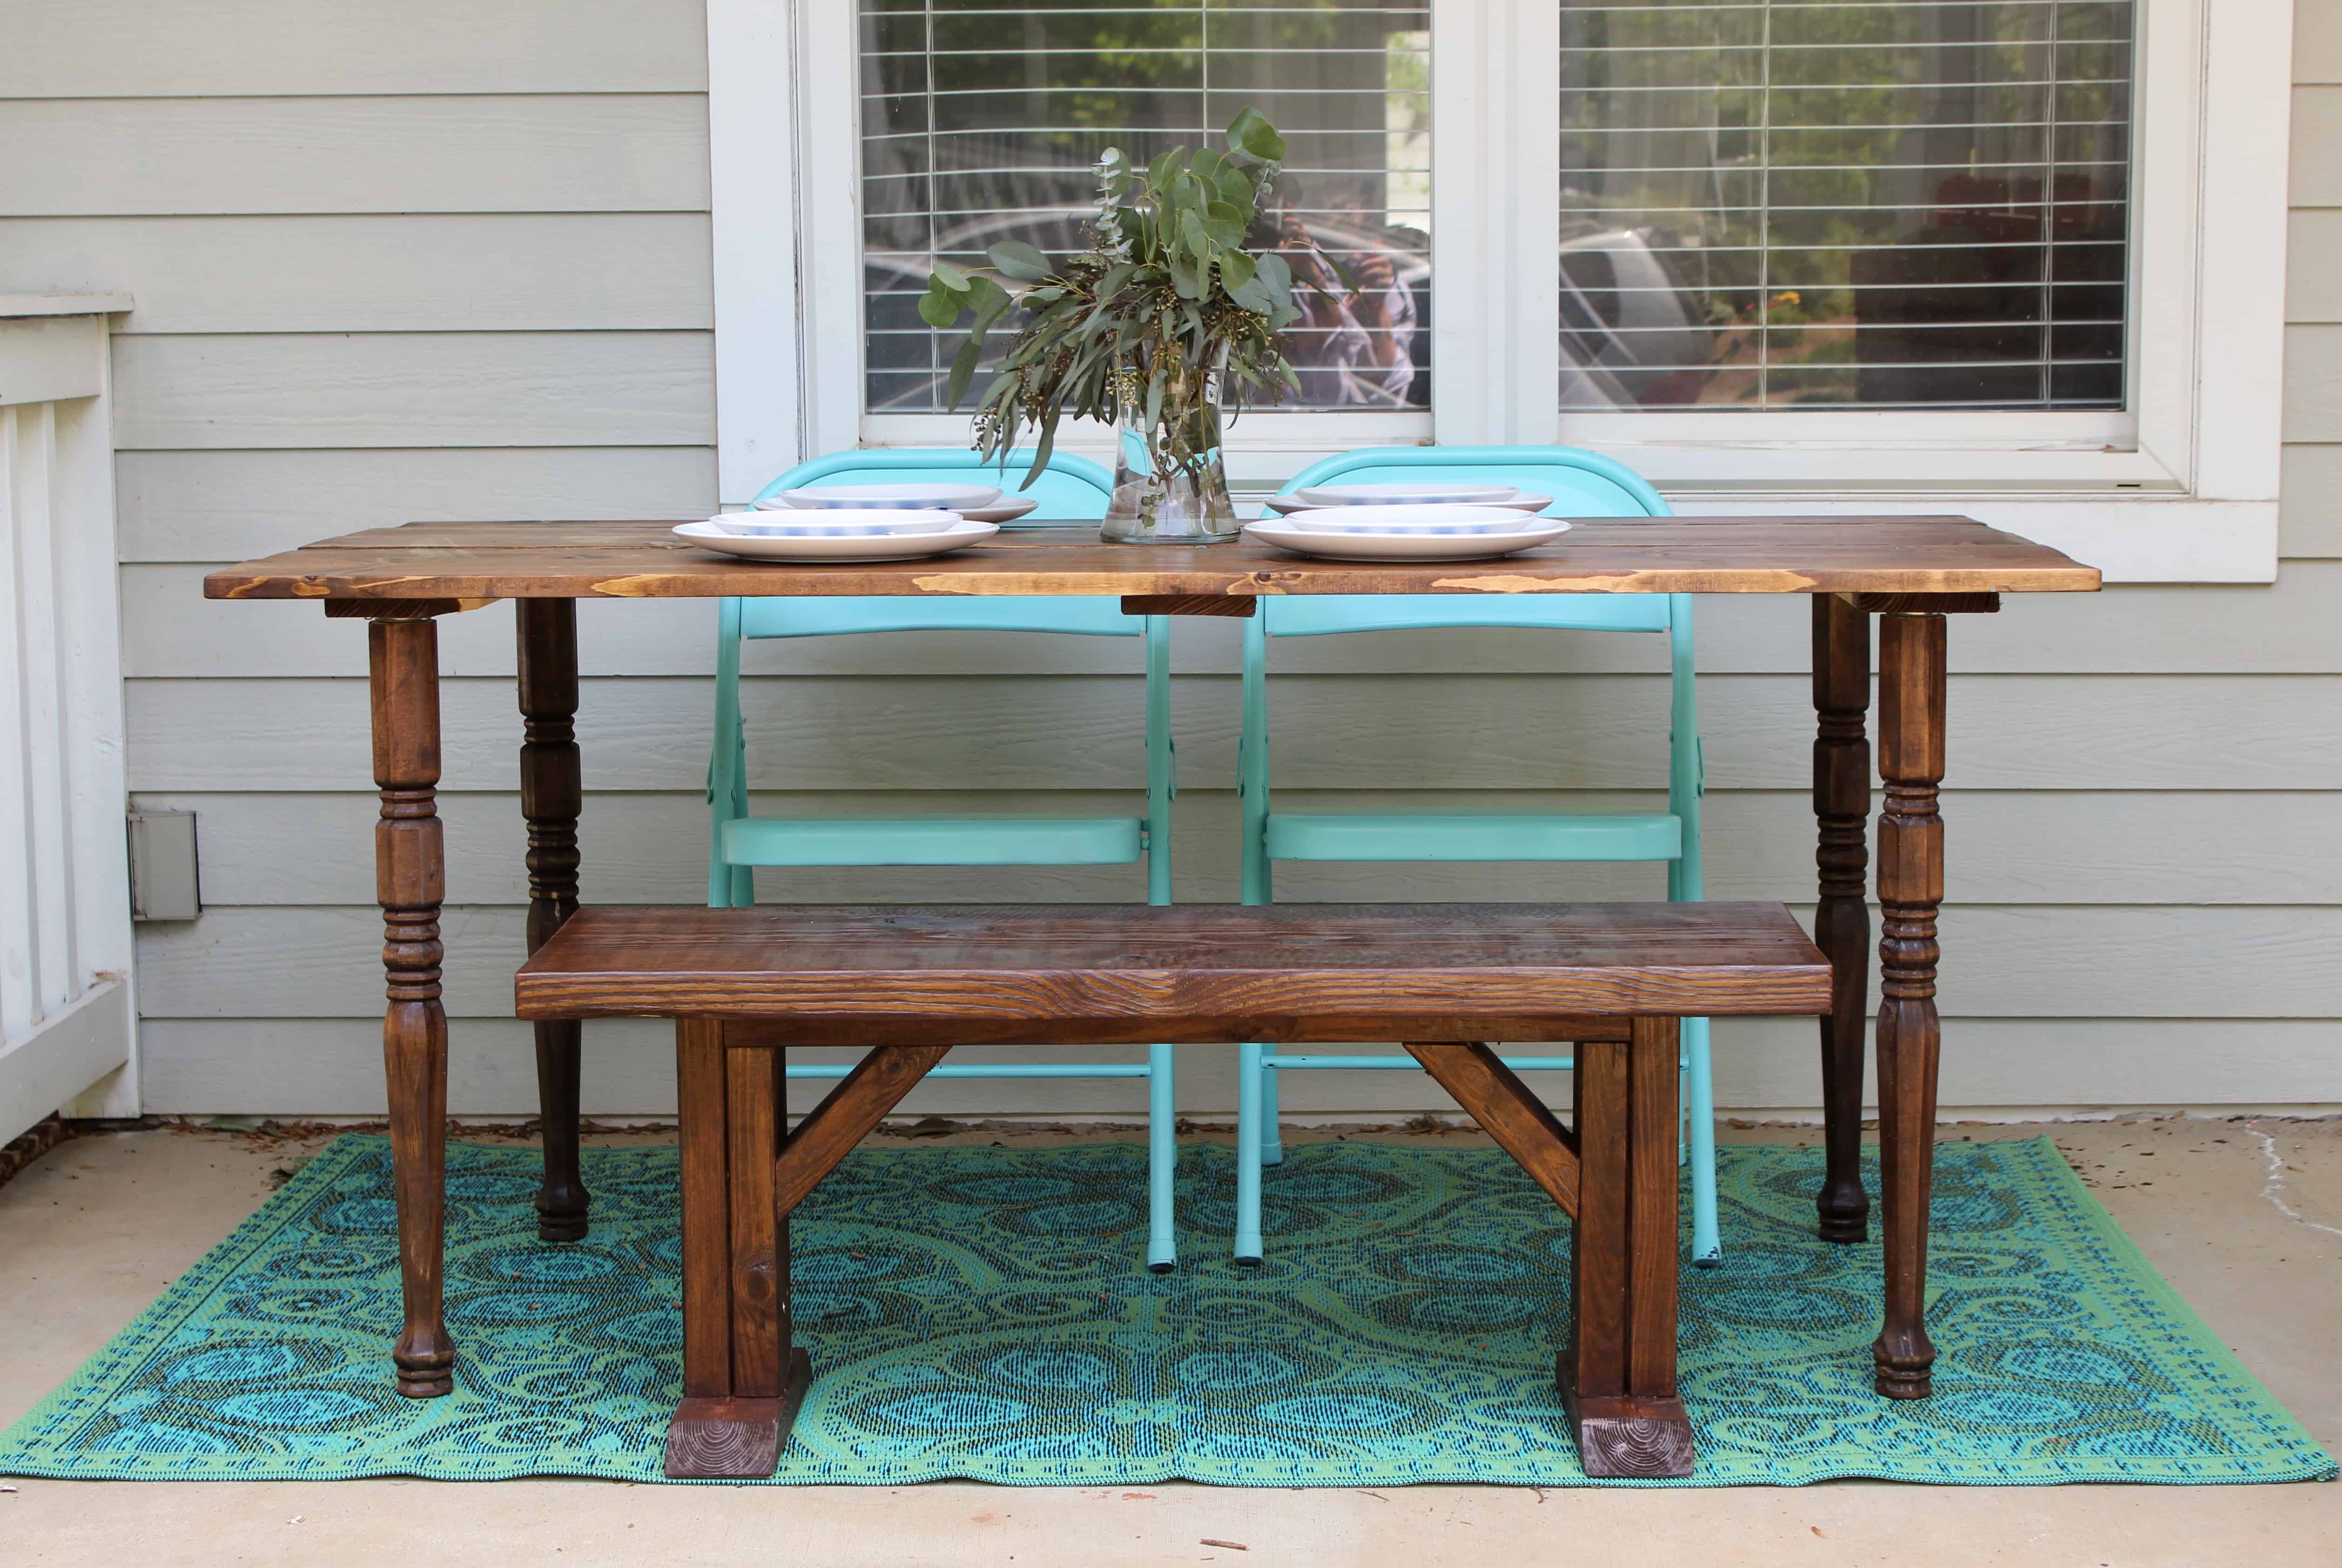
I’m so happy to finally share the last installment of my One Room Challenge deck project.
The DIY Marquee Anchor
I actually put this project off for a long time because it was intimidating to me. I thought it was going to be really hard and I might screw it up! I really didn’t want it to be a big fat fail!
But once I finally got up the nerve to start it I realized that it was not nearly as hard as I thought it would be. I don’t know why but in my head I had blown drilling through metal WAY out of proportion.
Before I started I thought I would need fancy drill bits or other tools but I used my standard bits and my Ryobi drill that I love and was fine!
So here goes nothing!
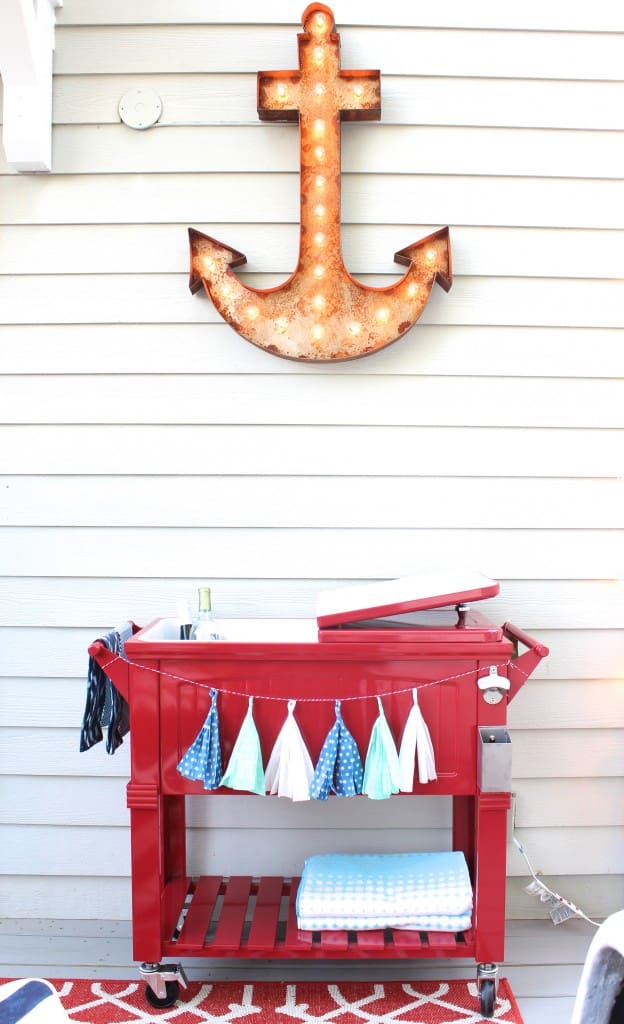
To start I found the anchor at Black Lion last year and at $89 it was a huge splurge for me. But Simple Stylings was brand new and I was smitten with it and just knew it could be something great. It was huge and really did look old and rusty! So worth it!
MATERIALS:
Target outdoor string lights {you can find them here}
Round sticker labels {like the kind you use for yard sales}
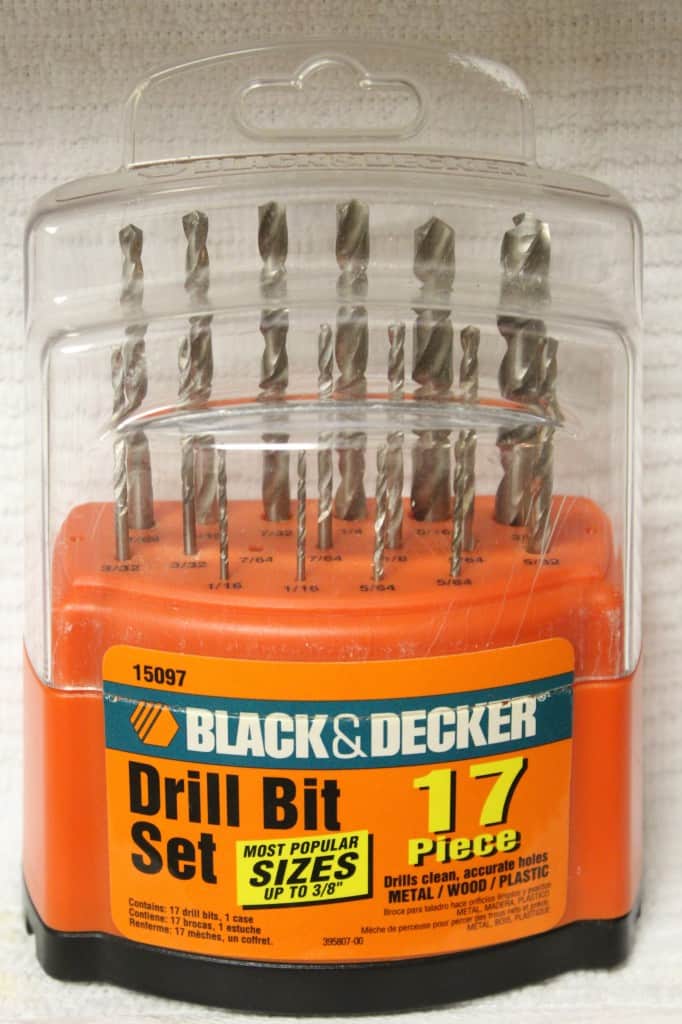
Drill and drill bits
Screws {wood/metal screws and exterior screws}
Wood block
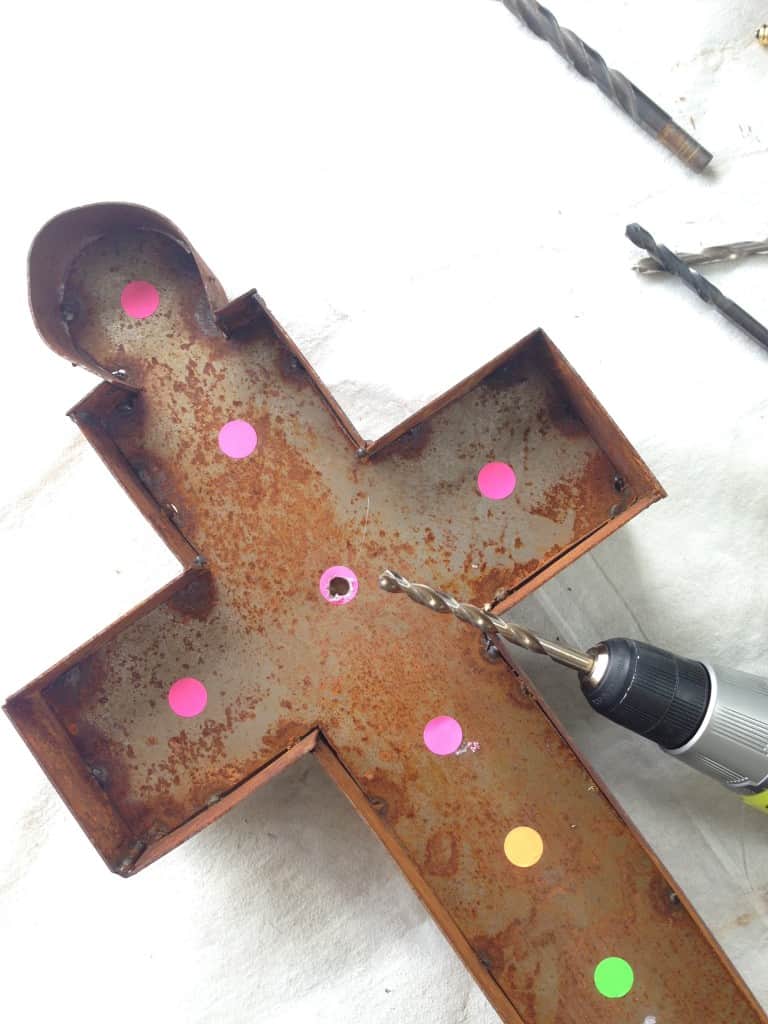
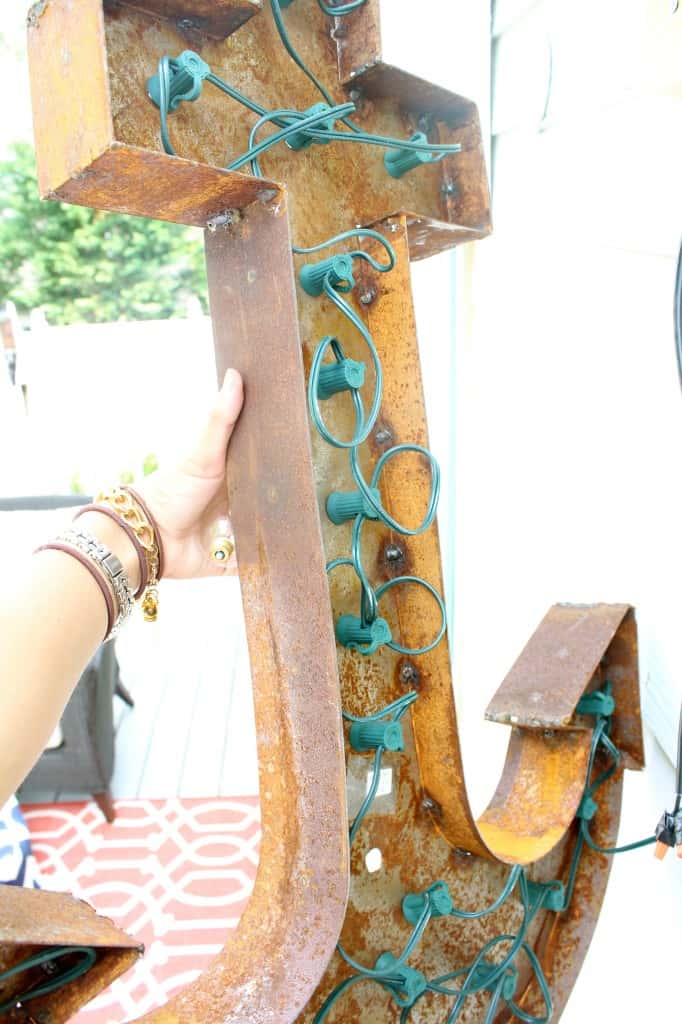
First step was figuring out where I wanted the lights to go so I spaced them evenly and put a sticker where I wanted each one.
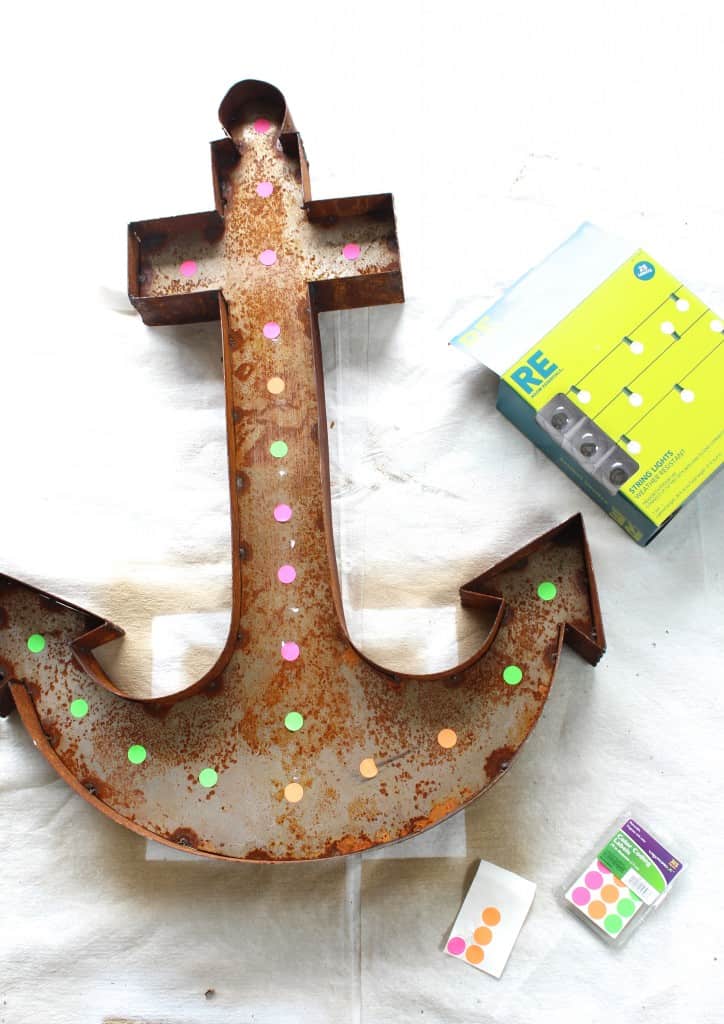
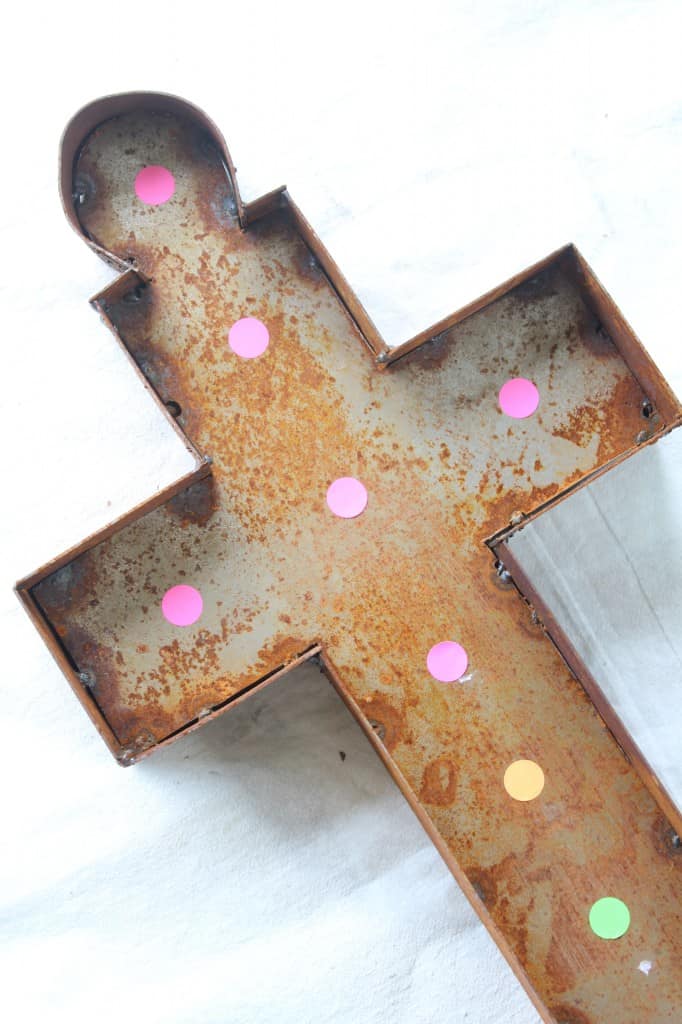
Honestly, the trickiest part of this whole project {or I should say annoying part} was figuring out how big to drill the holes and which size drill bit I needed. Every time I thought I had the right size bit the hole ended up being too small.
I have a standard set of drill bits that indicated they are okay to drill through wood, metal, or plastic. I used several different ones until I realized I needed the largest one {3/8}.

The 3/8 bit was still a little too small so I really worked with each hole, putting pressure around the edges as I was drilling so the holes would open up a little more.
I drilled directly through my stickers and the metal and to my surprise it was super easy! Once the holes were big enough I just had to scrape away some of the metal shards that peeled back but it was all good.
You want the holes to be big enough so that when you thread the bulb through the hole and screw the back on it’s not too tight. Once the bulbs are screwed in and secure you should be able to wiggle them slightly. I wouldn’t want to have them screwed in too tight and risk breaking the bulbs.
Unscrew the bulbs and one by one put the bulbs into the holes in the front of your marquee and screw the backs on.
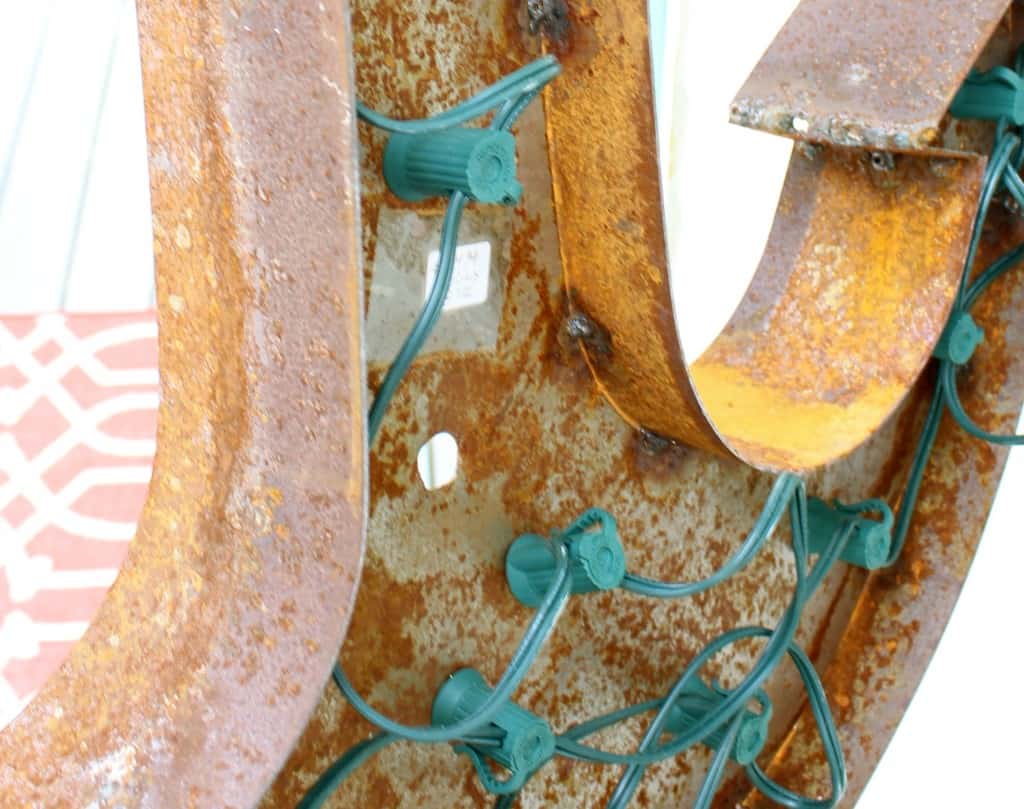

The string lights I used have 25 lights and I think I only needed about 20 so I just tucked them away in the back and left them.
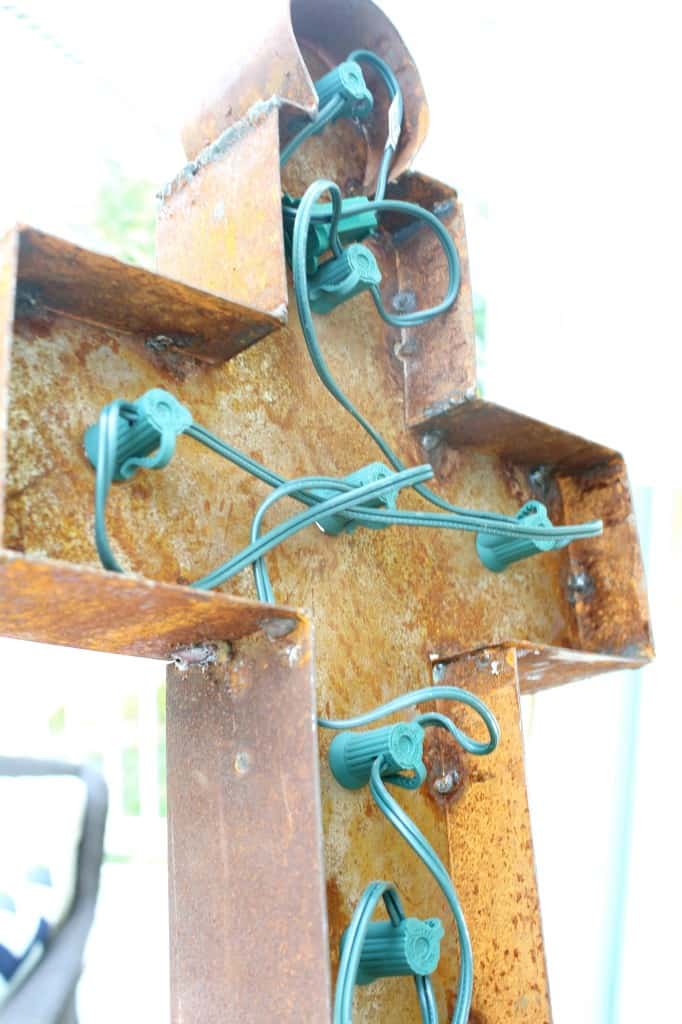
I tested the bulbs several times to make sure they were all screwed in tight and working before we hung it.

Here is the back of the anchor before we hung it. {I obviously screwed that missing bulb in :) }
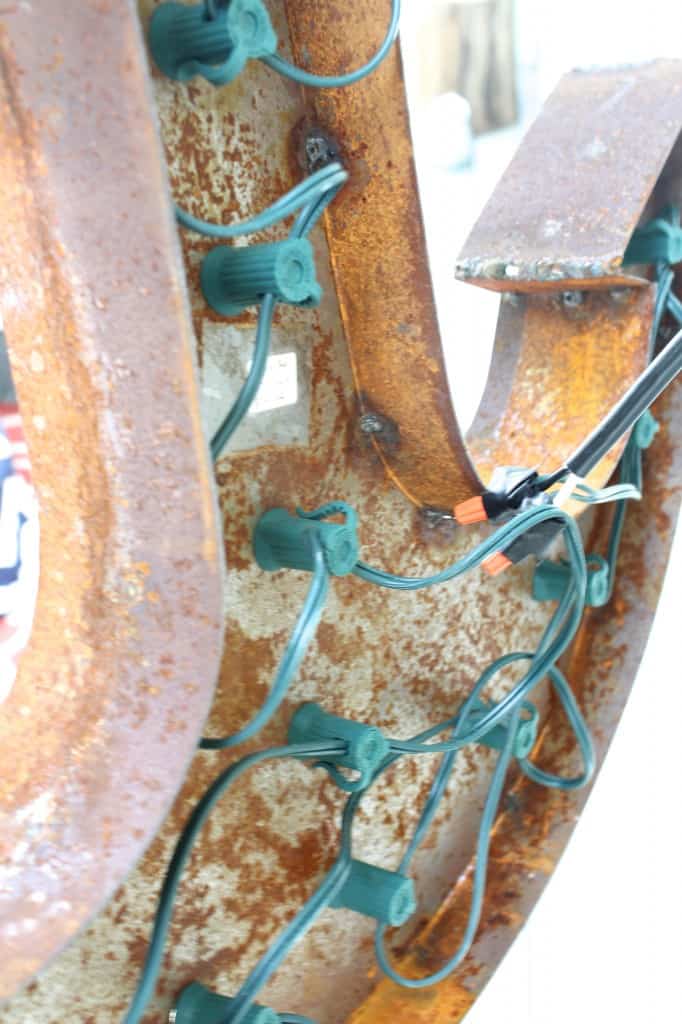
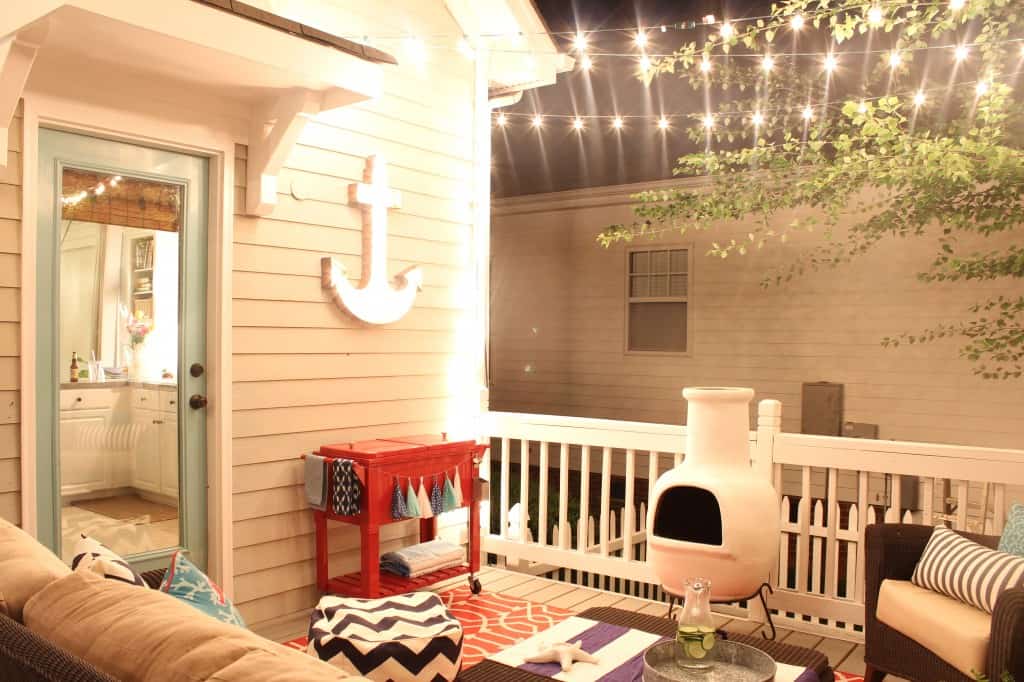
We ended up actually wiring the string lights into the existing electrical box after we removed the old fixture. I won’t do a tutorial on wiring as I am not electrician and actually my sweet guy surprised me by wiring and hanging the light while I was at work! {That’s why a few of the pics are out of order because I had to take it off the wall a little to finish shooting it} Feel free to shoot me a comment with any questions you may have though and we’ll try and answer them!
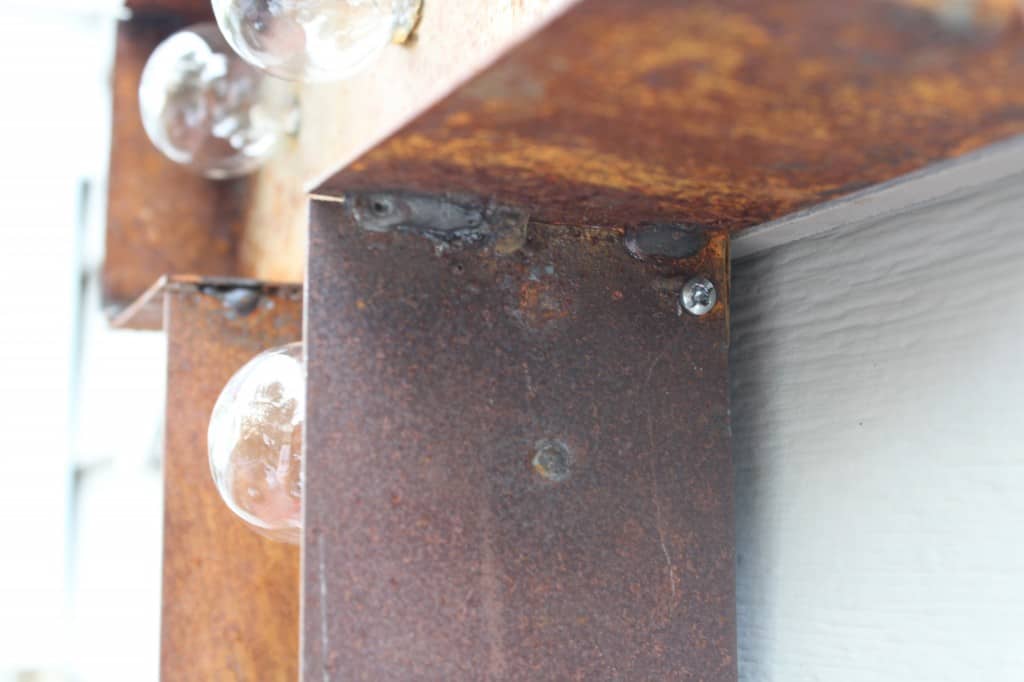
In order to hang the anchor we cut a small block of wood to fit just inside the side edges of the anchor and screwed it directly into the siding with exterior screws. We placed the marquee anchor on the block and drilled a screw on either side through the metal into the block.
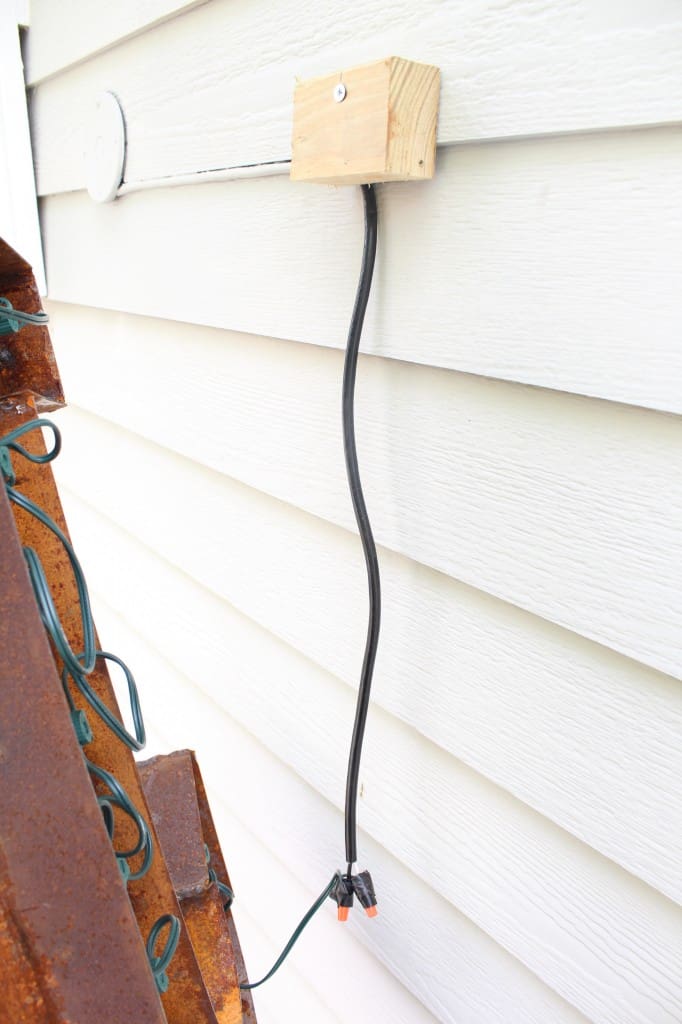
These two pictures are a little out of order but you can see where we wired it to the existing box. We sealed it and taped it until the caulk was dry. Above you can see where where we painted over the cord and existing box.
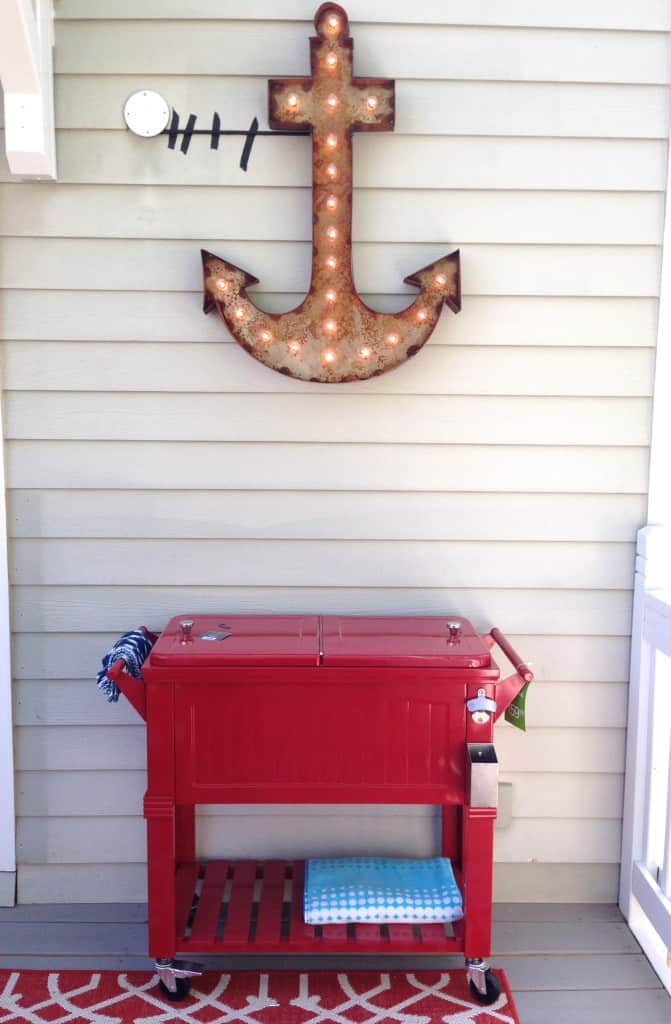
See how it just disappears and you can hardly tell that it’s wired in! This is actually the only light {other than the canopy lights} on the back exterior of the house. It worked out perfectly and it is so bright!
I can’t help but love these pics every time I see them. And y’all this is how it really feels out there. I swear I have been enjoying it almost every clear night since the ORC reveal!!!
If any of you are attempting or have wanted to attempt your own marquee sign, I hope that this will give you the courage to do it. It really isn’t hard and starting the project is half the battle.
What do you guys think? I hope you love it as much as we do!!! Little man can’t wait to turn it on every night and loves that he can just flip the switch from the inside :)
I’ve got lots of great DIY projects to come this summer so if you don’t miss any you can subscribe to get my posts directly in your email! Just enter your email in the box at the top right side of this page!
Have a wonderful weekend friends!
LINKING UP:
Dimples and Tangles // Remodelaholic // Blissfully Ever After // Whipperberry // AKA Design + Life // Nap-time Creations // Joy In Our Home


Amazing, very creative work, thanks for sharing
Love this Summer!
Would Love to do this as I use the anchor sign for ,Christ is my Anchor. I use the anchor all the time,
plus very into beach collecting etc.
Thanks so much Carole! Christ is the anchor for my soul too :)
I have a metal “Hey, Y’all” sign that I would love to try this with. Do you think the lights get too hot for indoor use? Also, what color is that on your back door? I am in love with the whole space!
That’s awesome Dana! In my opinion I don’t think the lights would get too hot indoors as long as it’s not next to fabric or anything. Good luck with your project and shoot me a pic when it’s done! I love the hey y’all :) The door color is Spirit In The Sky from Benjamin Moore!
I am still in awe of your deck, girl! And love this choice of lighting soo much! Suits your style perfectly :) So glad your linked up at Motivational Monday! I appreciate it lots!
Thanks Kendra!
Awesomeness!
Thanks so much Mila!
Love love this anchor! I am planning a similar project but with an arrow for my son’s bedroom.
Thanks so much Rachel!! Good luck with yours and feel free to email with any questions!
So perfect, Summer! Great job!
Thanks so much Gwen!
Thanks for linking to Create Link Inspire at The Crafty Blog Stalker. You have been featured and pinned! Thank you for sharing.
–Katie, TheCraftyBlogStalker.com
Wow, thanks so much Katie!!! I really appreciate it!
What a wonderful idea!
Will pin on my to-do board!
Love this!
Thanks so much Gloria!
This is one of my favorite elements of your deck! Cheers to a DIY project well done! It’s even more amazing in person! Thanks for sharing the details!
Thanks Sarah! I’m so glad you like it!
I really, really love this Anchor! I want one…so cute. It adds so much character and charm to your outdoor space—what a great idea! I pinned it. Just dropping by from Place of my taste and the workit wed. linky- Aniko mentioned you:) Have a great week!
Thanks so much Rachel! I’m really glad you stopped by!!
Love this! You did an awesome job. You’re a better wowan than me. : )
Thanks so much Cheryl!
What a fabulous project!! So fun!
Thanks so much Vanessa!
This is so awesome! Love that you drilled through the metal! I would be so nervous!!!
Your deck is just gorgeous!
Thank you so much Amber!
Love this! Perfect for your patio
Thanks Julia!!
Summer, this is so awesome!! What a fun, unique addition to your amazing deck!! Thanks for the great tutorial and sharing at Best of the Nest!
Thanks so much Pam and you’re welcome! I love Best of The Nest!
oh, wow–love it! Drilling through the metal would have intimidated me, too….glad you went for it!
Thanks so much Gretchen!
LOVE this DIY- I want to make one soon- you did an amazing job!!
Thanks Krystine!!!
It turned out beautiful, Summer!!!
Thanks Rach!