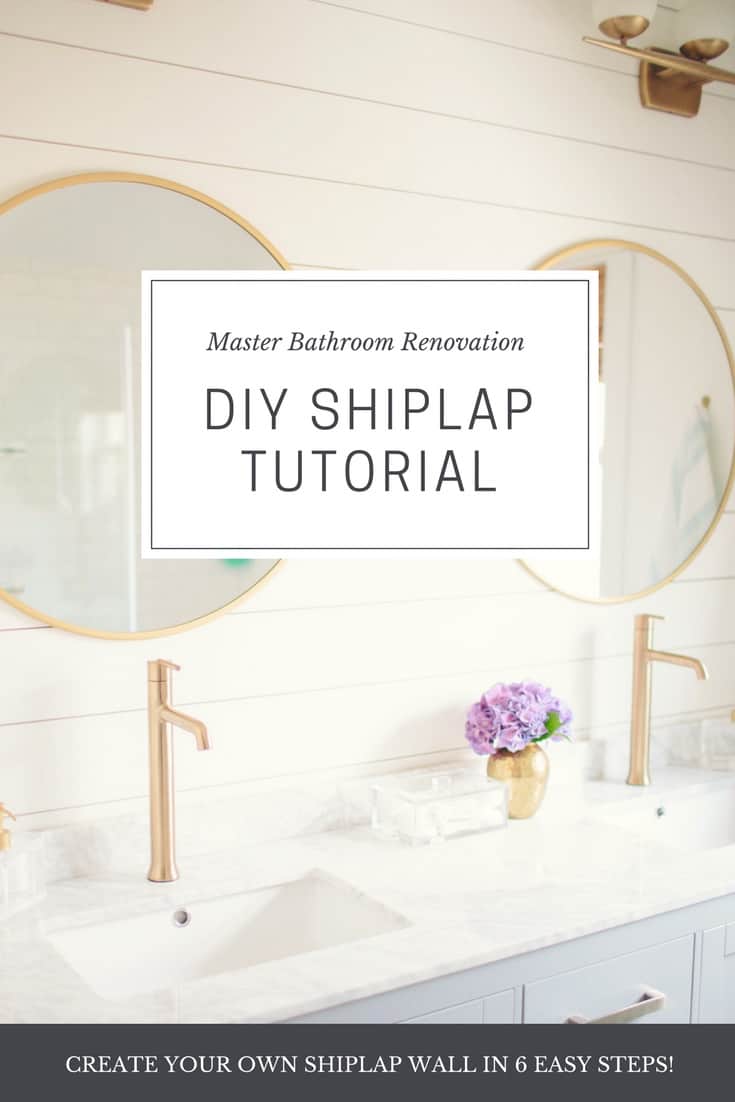
Master Bathroom Renovation: DIY Shiplap Wall Tutorial
Happy Tuesday friends! I hope you all had a great weekend!
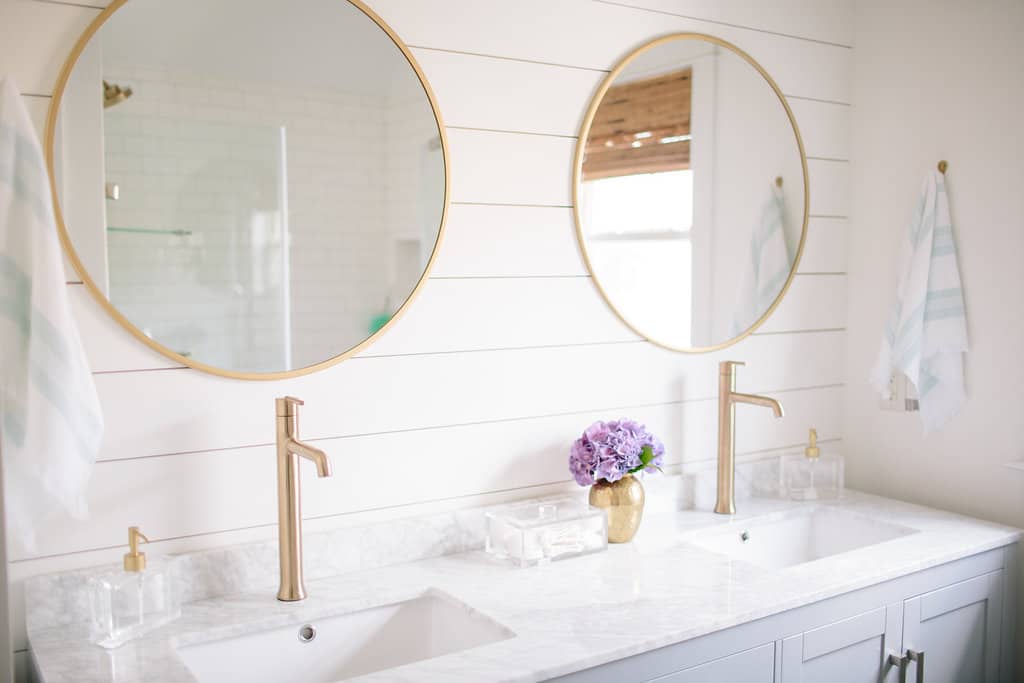
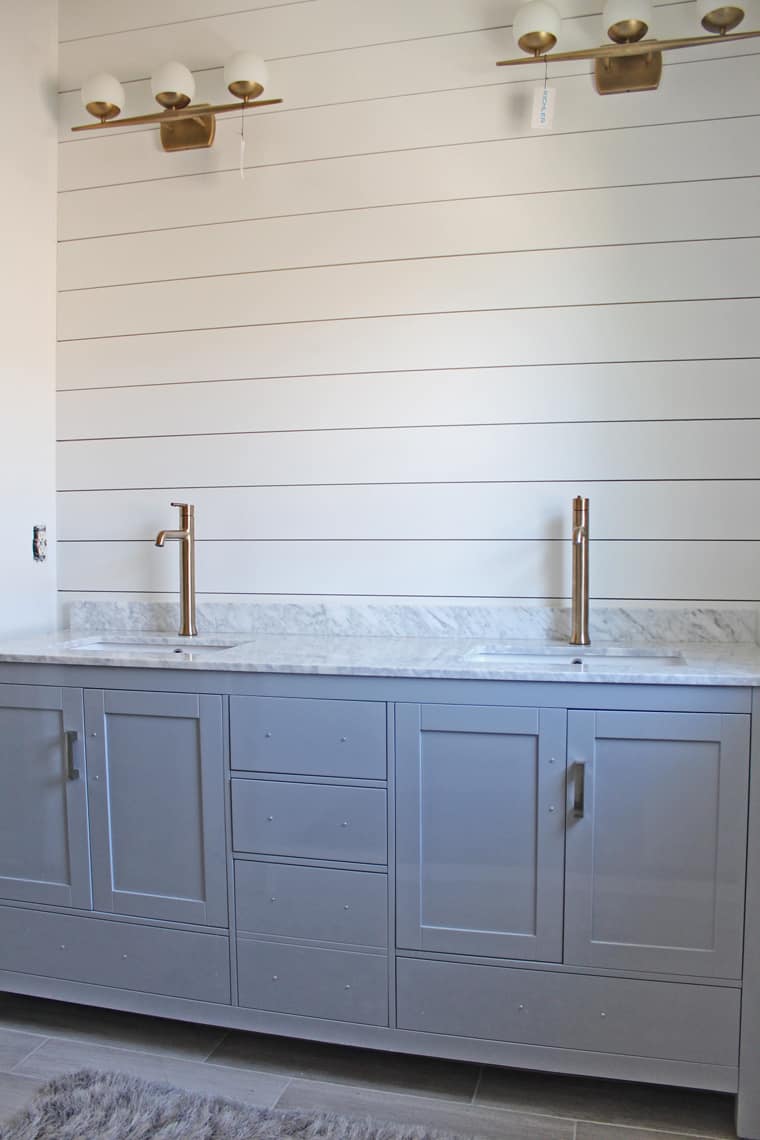
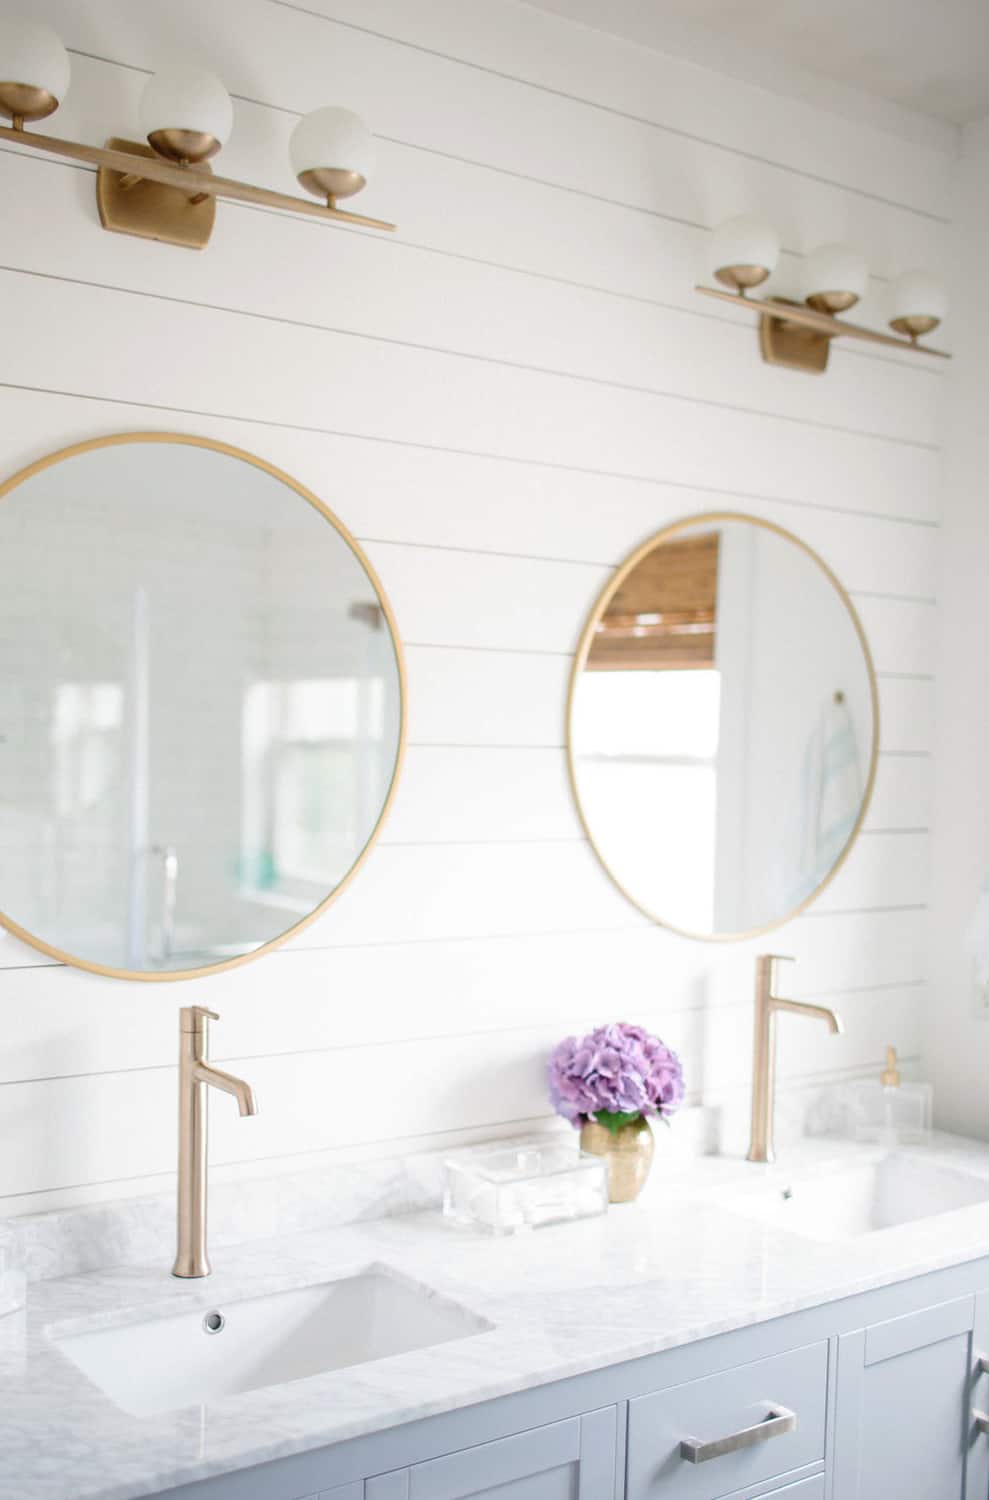
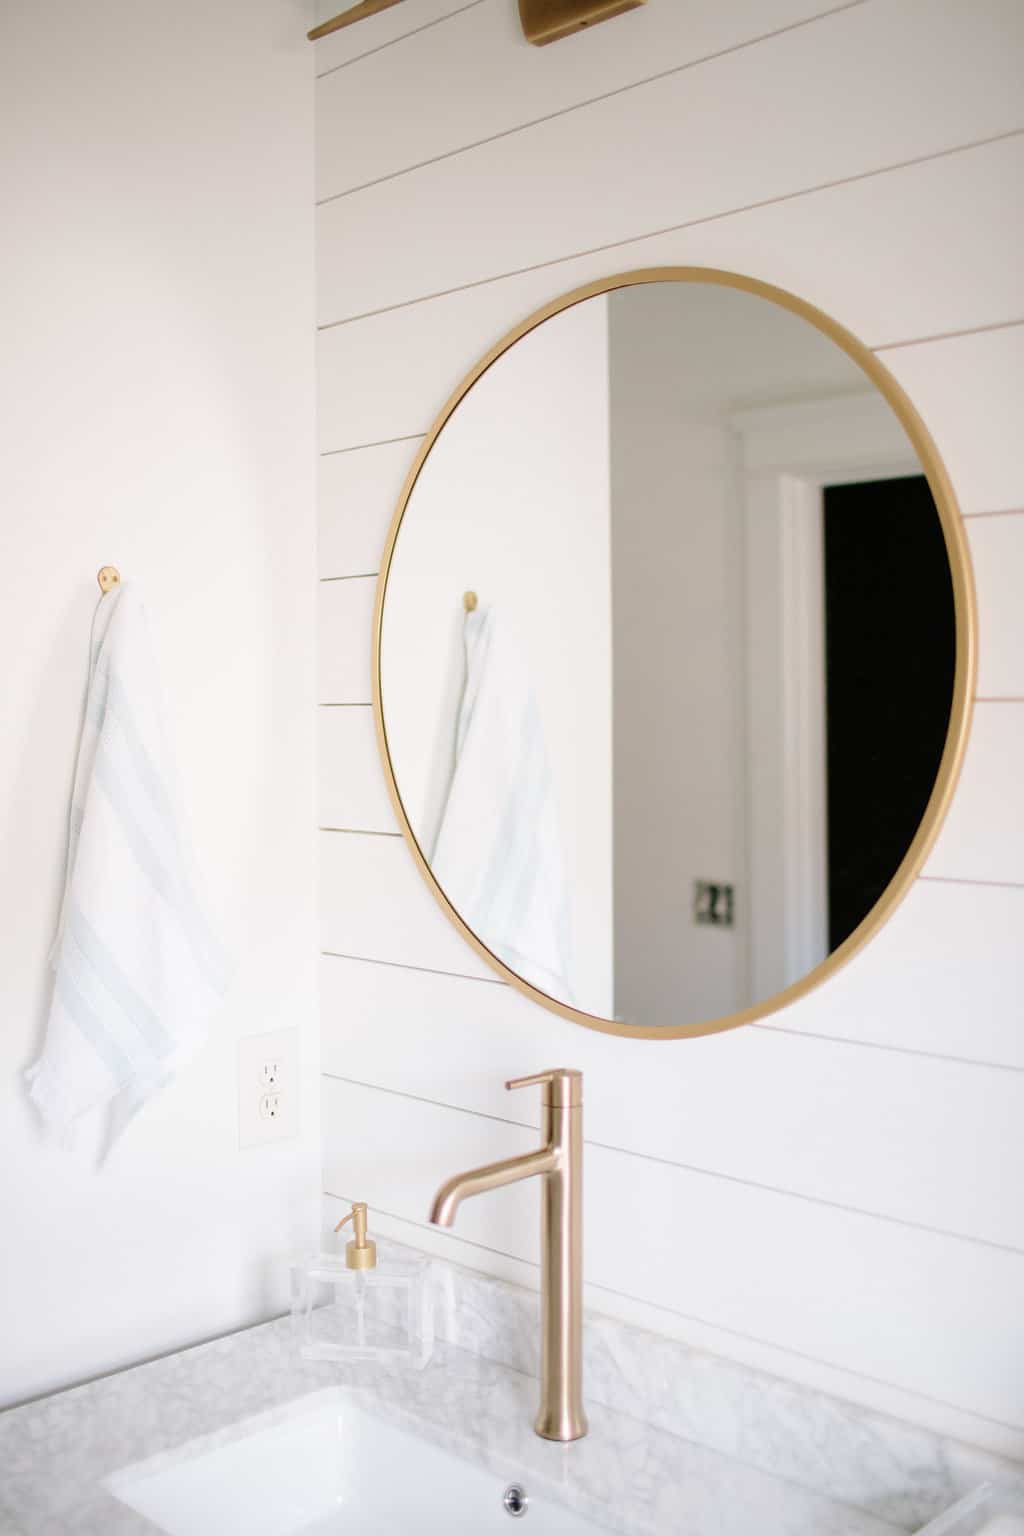
This post is long overdue but shiplap is one of my all-time favorite projects so I’m excited to share the tutorial with you. This is the second shiplap wall I’ve done, the first was in our kitchen and I didn’t get around to writing the tutorial back then. Our master bathroom remodel that we completed in the spring with Lowe’s Home Improvement was the perfect place for another accent wall!
This is an awesome DIY project because it makes you kinda look like a bad a$$ for doing it yourself, it’s easier than it looks and it gives SO much bang for your buck! So, if you’ve ever wanted to try your hand at shiplap, I’m going to tell you how in 6 easy steps!
Materials
1″ x 6″ x 8″ wood boards (I like the primed pine boards from Lowe’s)
Spacers (I used 1/8″ tile spacers but you can also use quarters)
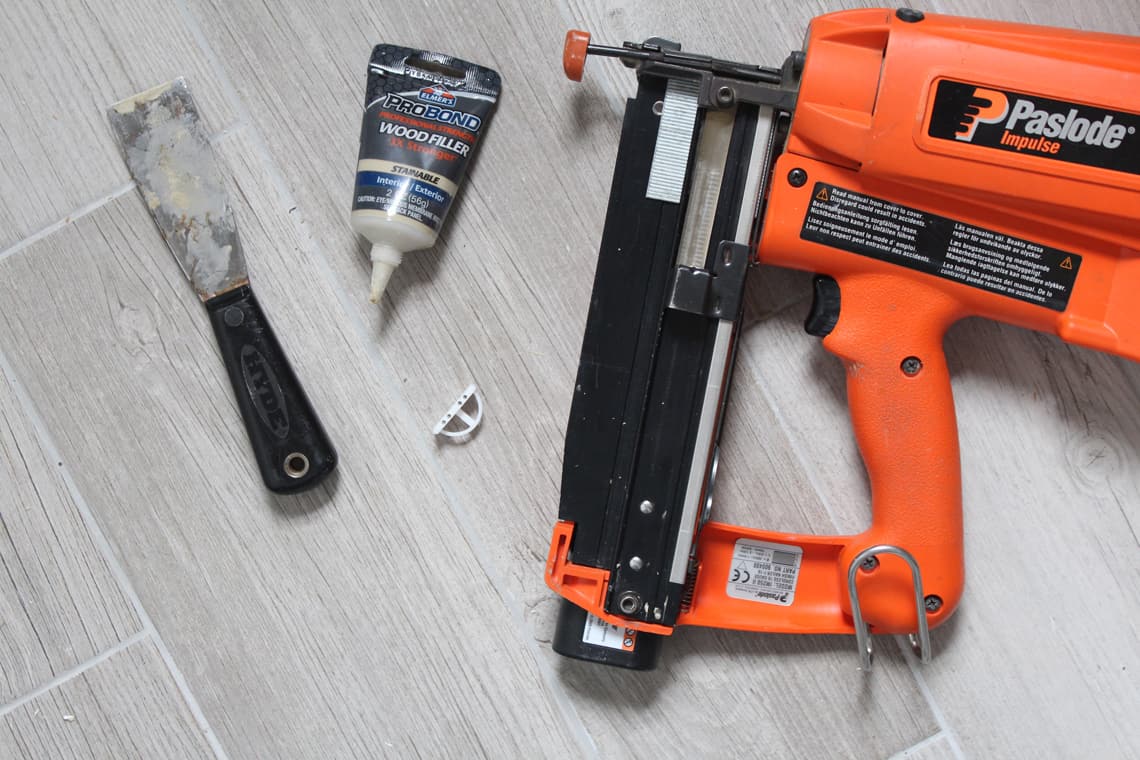
Nailer and nails
Liquid nail
Moulding
Wood filler and putty knife
Paintable caulk and caulk gun
Fine sand paper (180-220 grit is fine)
Paint
Tools
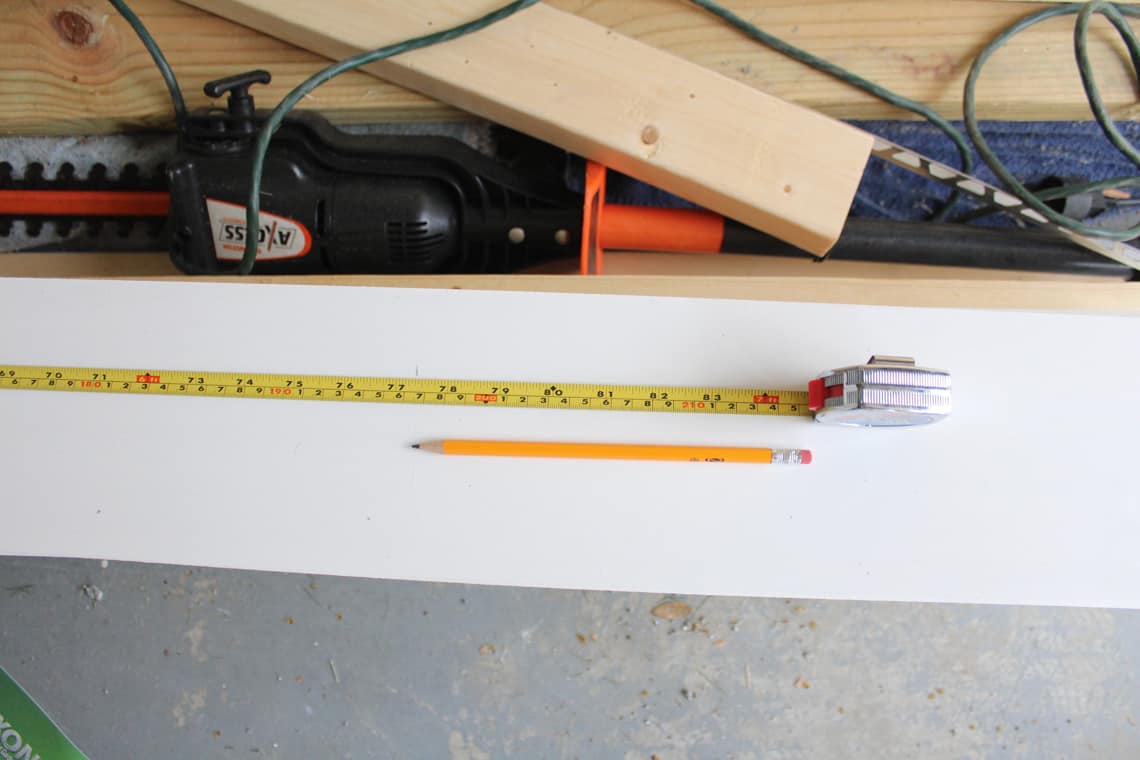
Measuring tape
Pencil
Stud finder
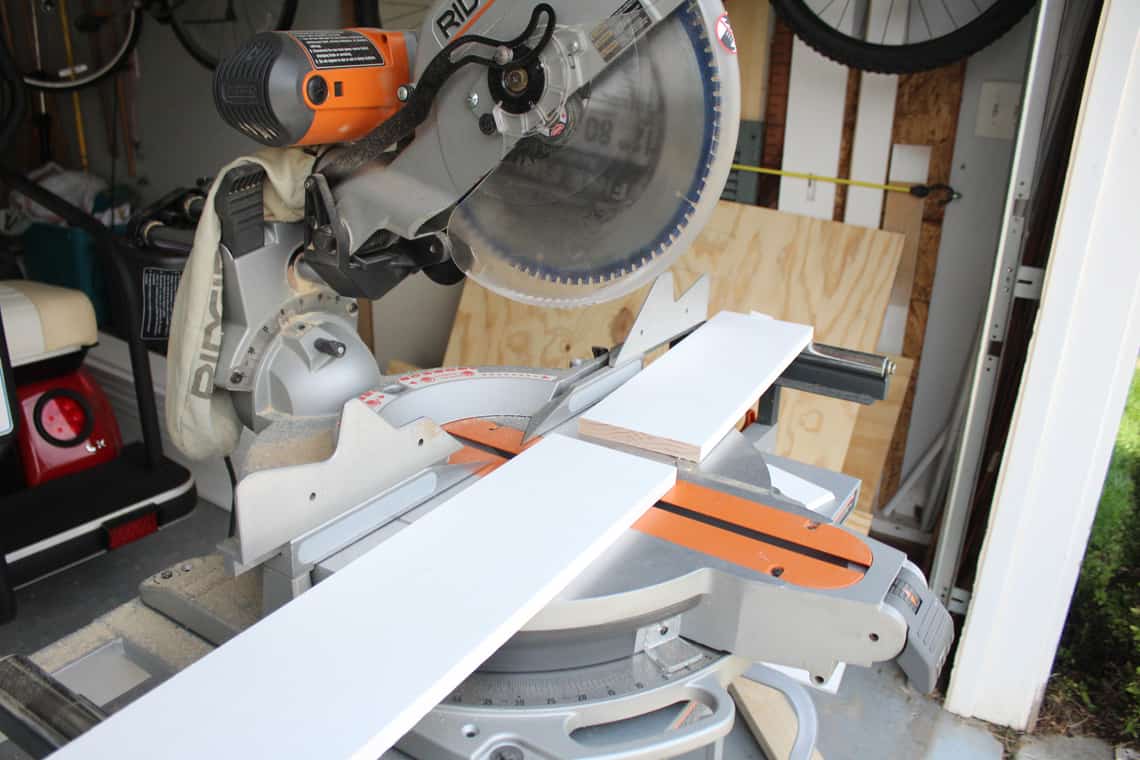
Miter Saw
Level
Electric sander (optional)
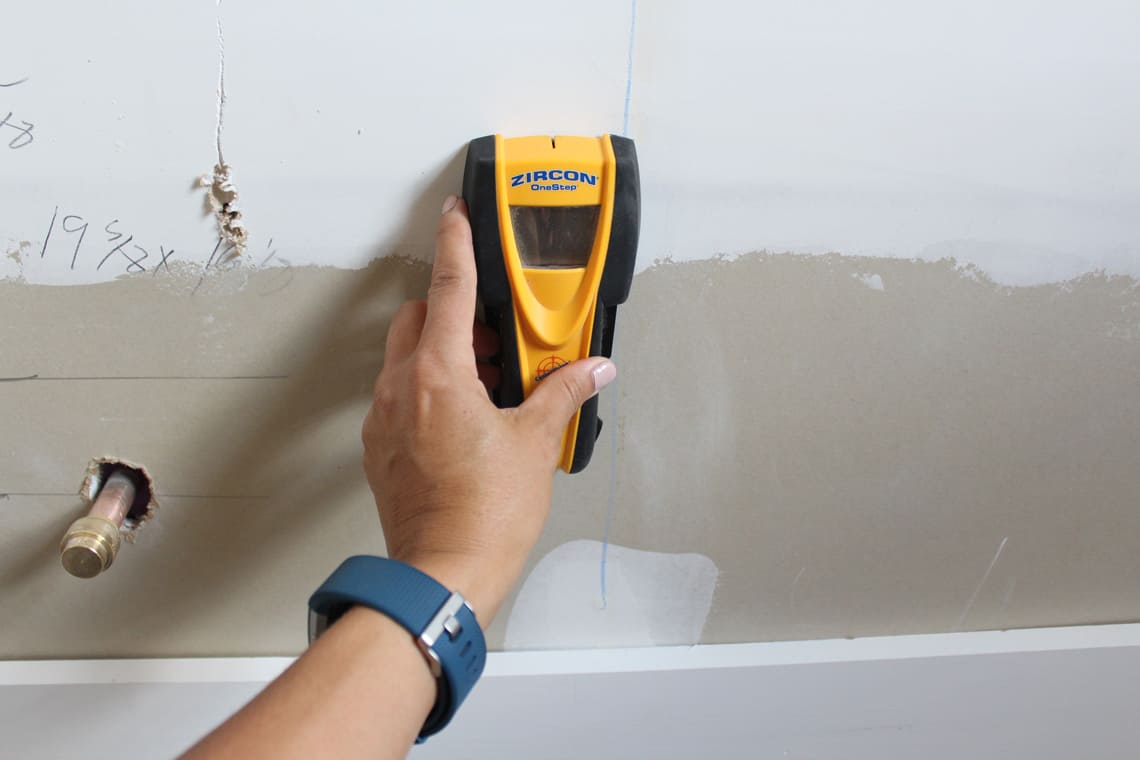
Step 1: Mark the studs
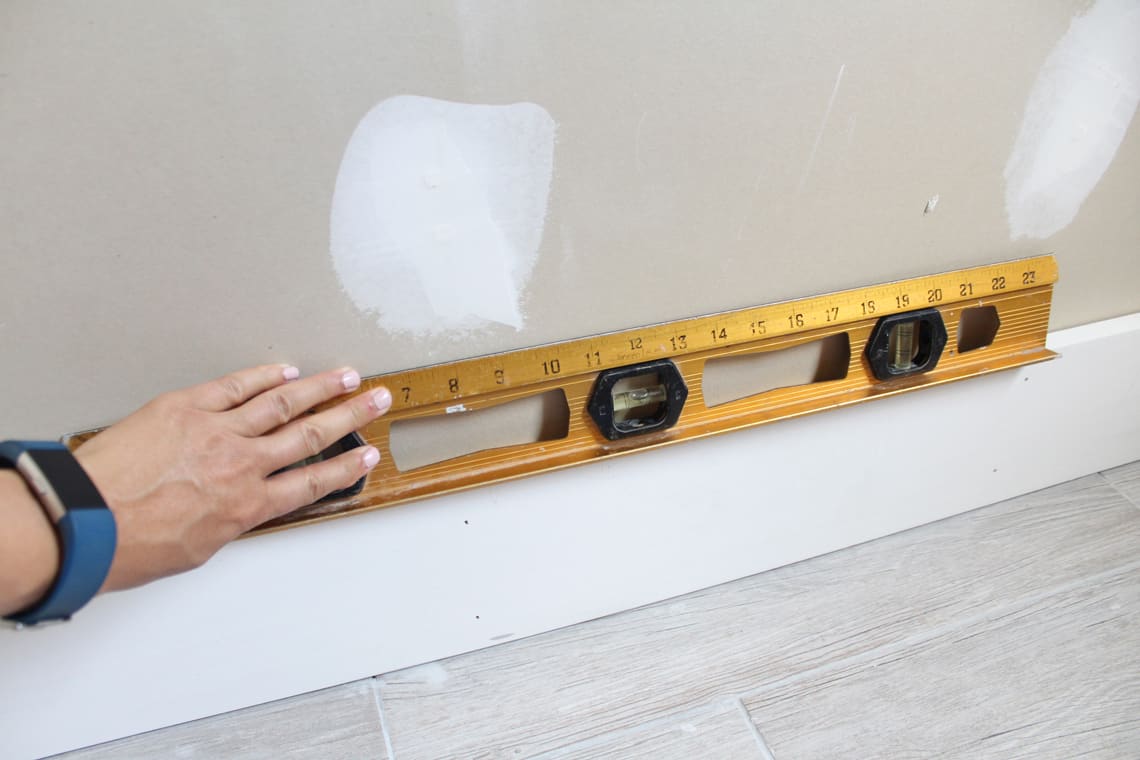
Before we start I will assume your space has been demo’d and your wall prepped. You will be starting from the floor and work your way up the wall to the ceiling. The bottom board is the most important board to have level and secured because you will be working your way up from this board. The more level this board is the more success you will have the rest of the way.
Using a stud finder, mark the studs across the wall. It’s not imperative to hit a stud with every nail by any means, that would probably be impossible, but I get a couple of nails on each board into studs if I can. I would try and hit the most studs on the bottom board as you can for security.
Step 2: Measure and cut
Measure the length of your wall, mark your board and cut it to size using a Miter Saw. You could have your home improvement store cut all of your boards to size for you, however I like to measure and cut each board individually because walls often tend to be uneven therefore causing a gap (or a board to be too long) in some areas. So if you have access to a miter saw I highly recommend it. Oh and the measure twice, cut once rule definitely applies!
Step 3: Install the first board
Next, put some liquid nail on your board, place it on the wall where you will be nailing it down, and get it level. Don’t worry about a gap between the first board and the floor as you will be coving that with shoe moulding (in our case) or your moulding of choice. We used plastic wedges underneath our first board to get it level but you can use any thing to stick under the board that works. Once the board is level and where you want it, hold it tight and nail it to the wall using your nailer. This is one time it is helpful to have an extra set of hands but I did it myself so I know you can too!
Step 4: Nail the rest of the boards
Now that the hardest part is over you will work your way up the wall. Measure and cut your next board then put your spacers between the two boards. If your first board is level then theoretically your next board should be level but check to make sure. You can always make small adjustments with your spacers if needed, particularly if there is furniture covering a part of the wall. I tried to make any adjustments behind my vanity and was extra careful when placing the boards that were above the vanity where imperfections could easily be seen.
Just repeat step 3 all the way to the top of the wall. A little side note: you don’t have to use liquid nail on every board, especially if you think you might remove the shiplap at some point. I used it on most of my boards for extra strength because our walls were pretty uneven and I don’t intend to take it down.


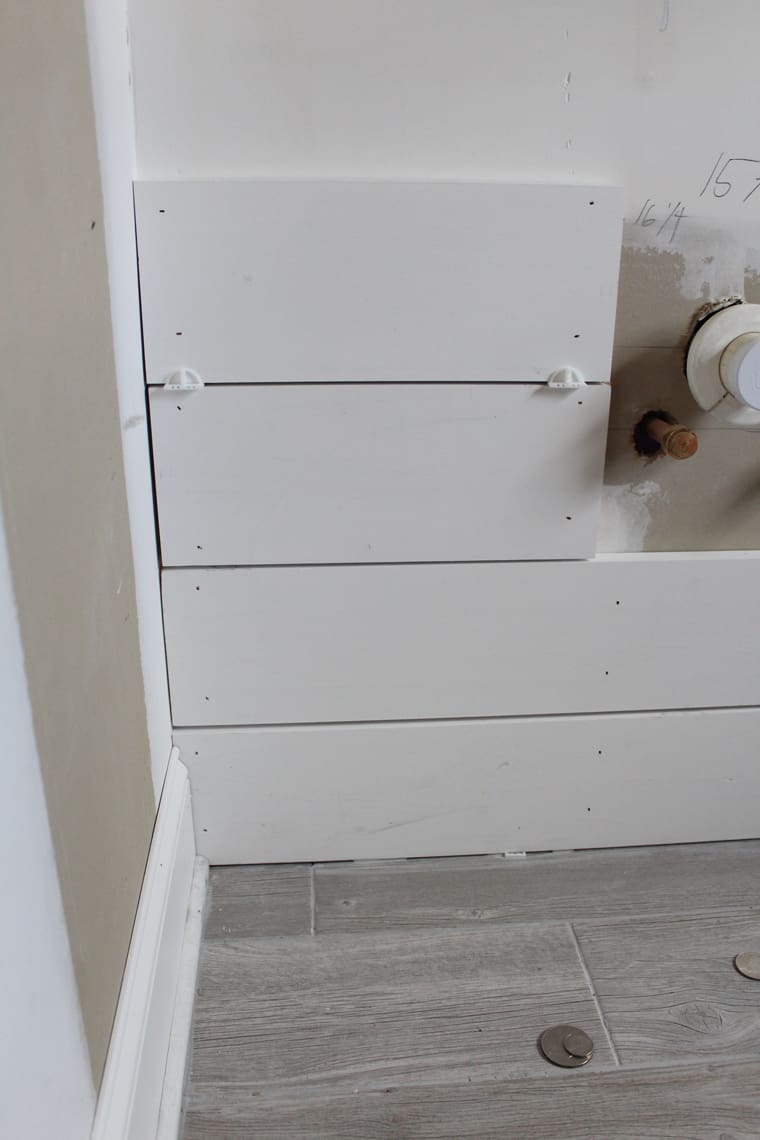
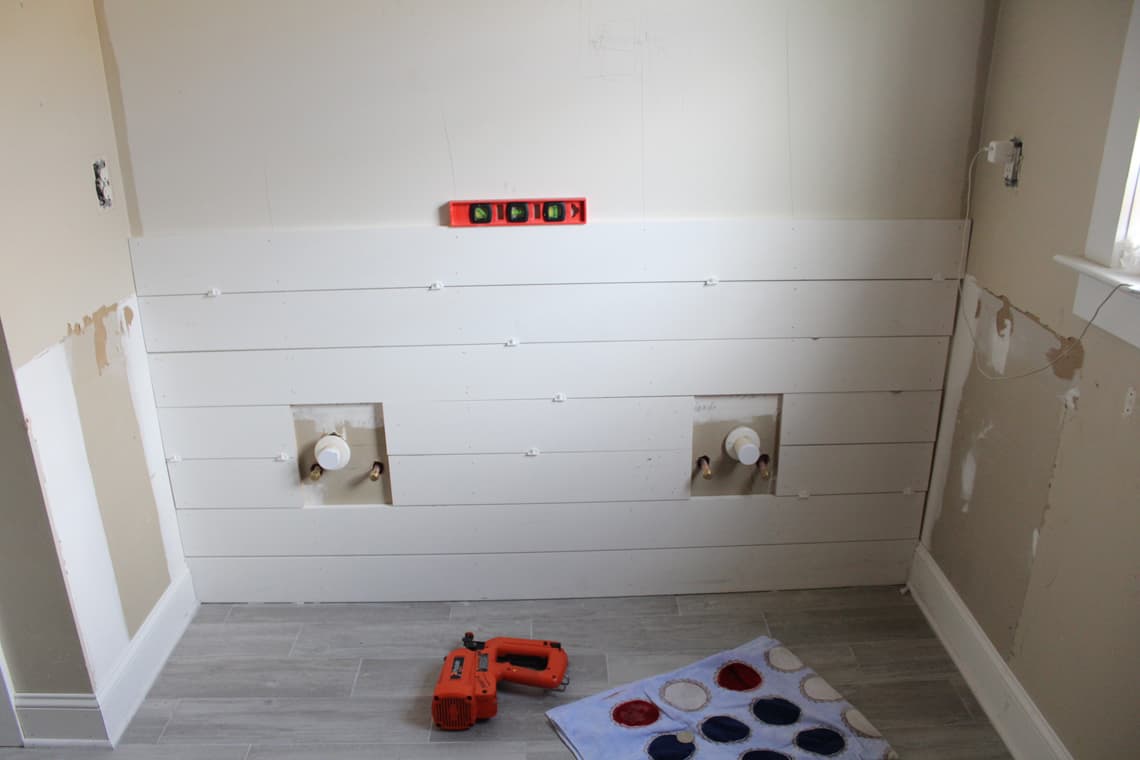
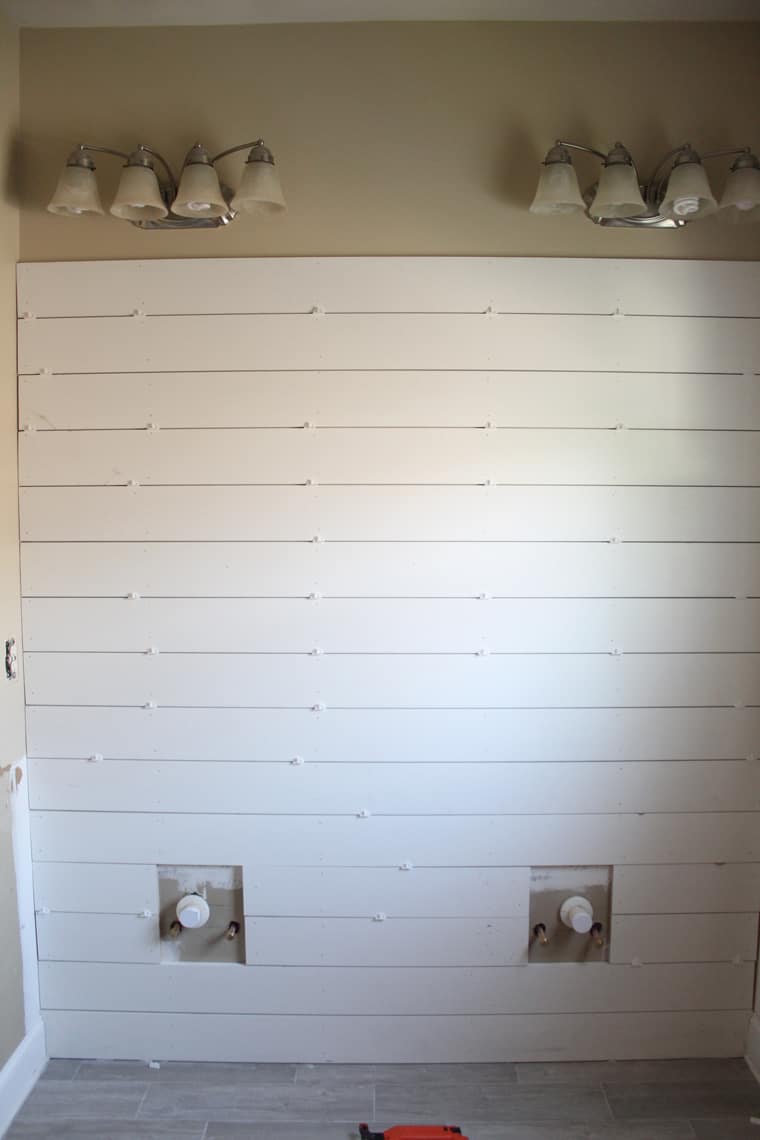
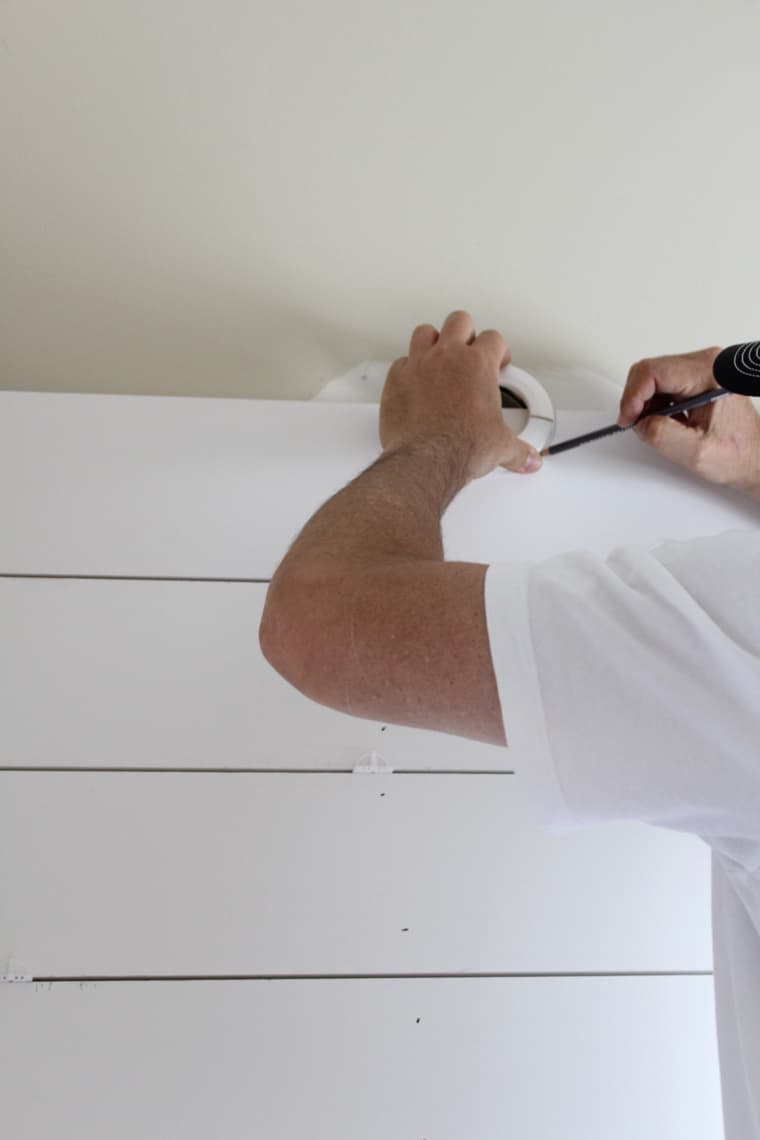
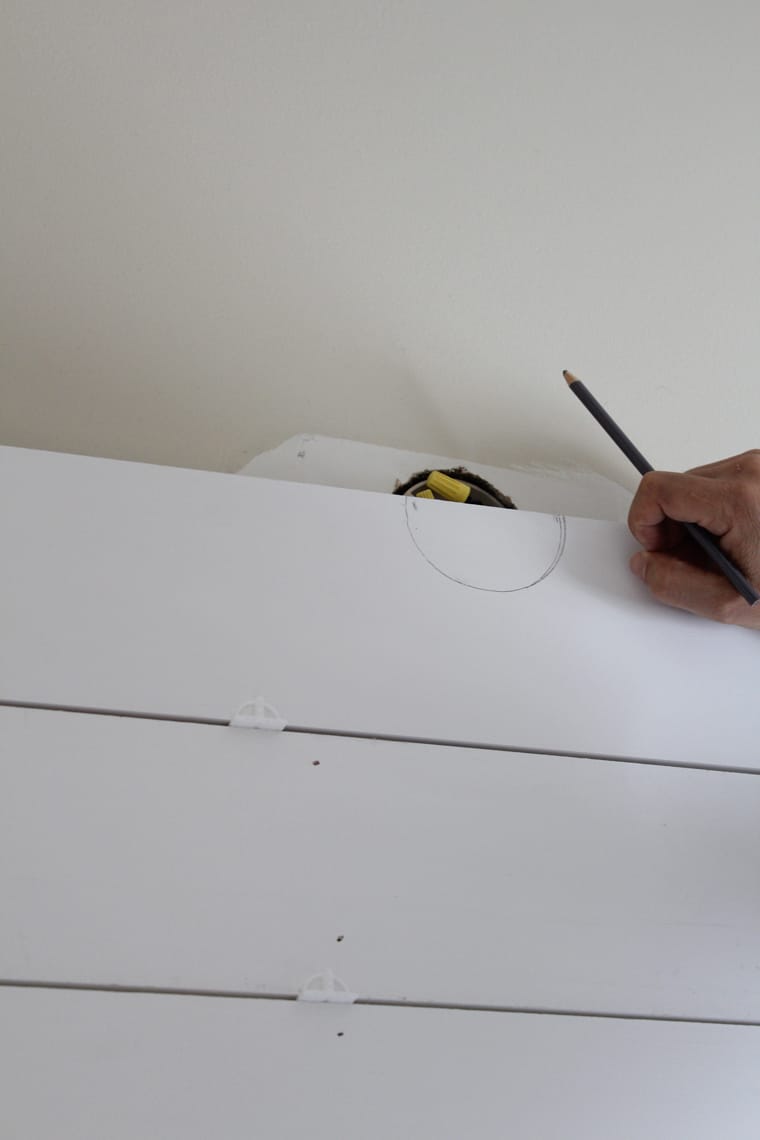
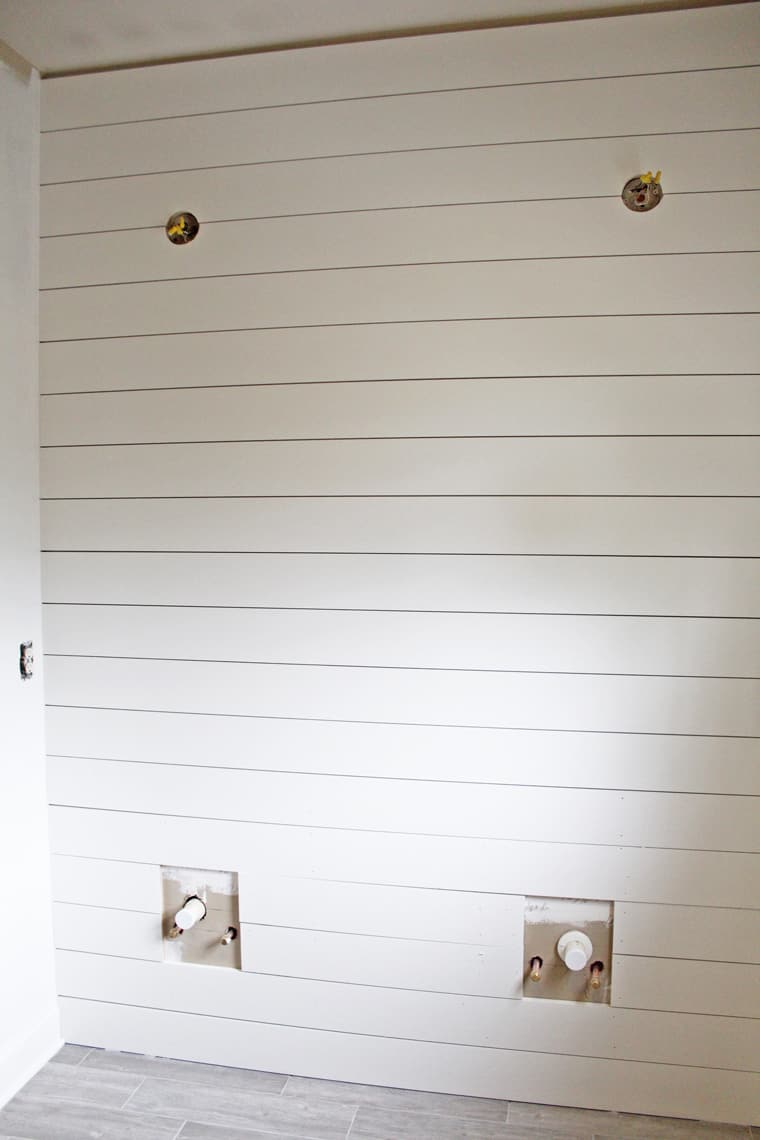
NOTE: If you have lights to work around like we did you can trace a cup or bowl the same size as the area needed and cut it out with a jigsaw. You will just have to work around them depending on where you are with your boards.
Step 5: Install the top board and moulding
Once you get to the ceiling you may have to make additional cuts or there could be a gap between your last board and the ceiling. If your board is too wide you will need to rip it to size using a table saw or have your home improvement store cut it for you. Once you have finished the last board you can install your trim piece or moulding. This will cover any gap if your boards came up short. I used a 1″ x 3″ x 8′ board as my trim piece but you can use any size trim or molding. If you have molding in the rest of the room it might make sense to match it but that is definitely personal preference.
Nail down your shoe moulding where the floor and bottom board meets. This is also the point where you would replace any moulding you had to remove from the walls next to the accent wall if necessary.
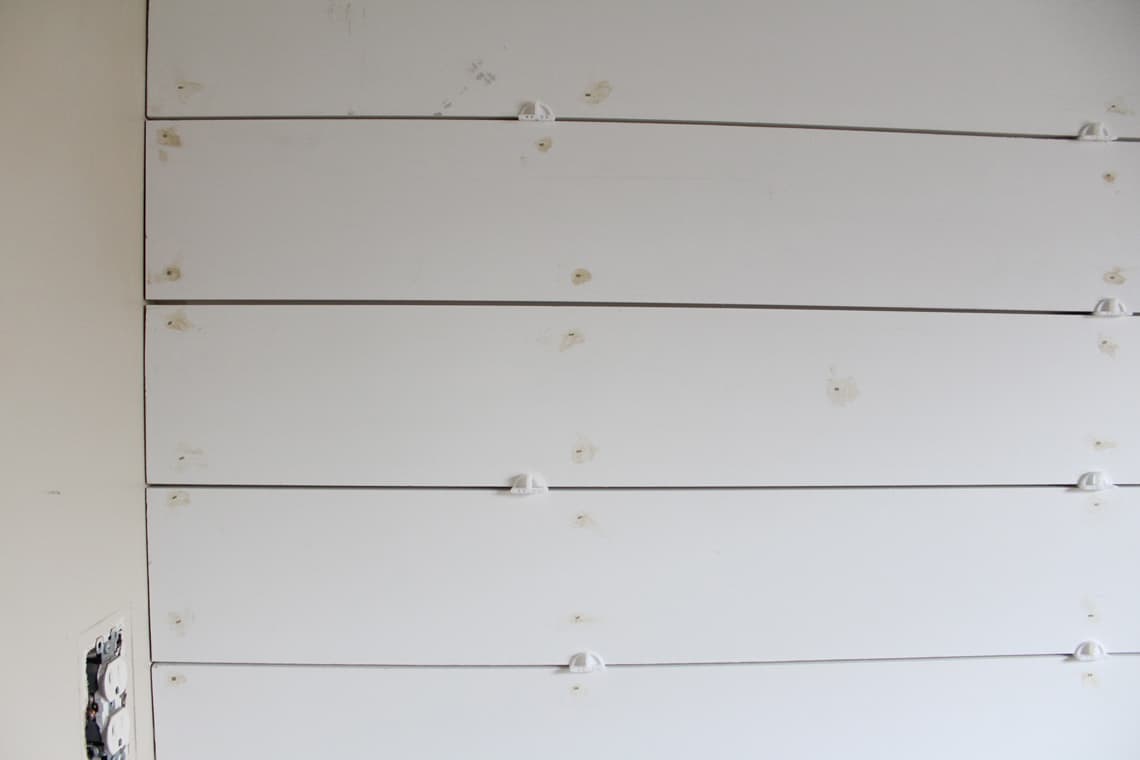
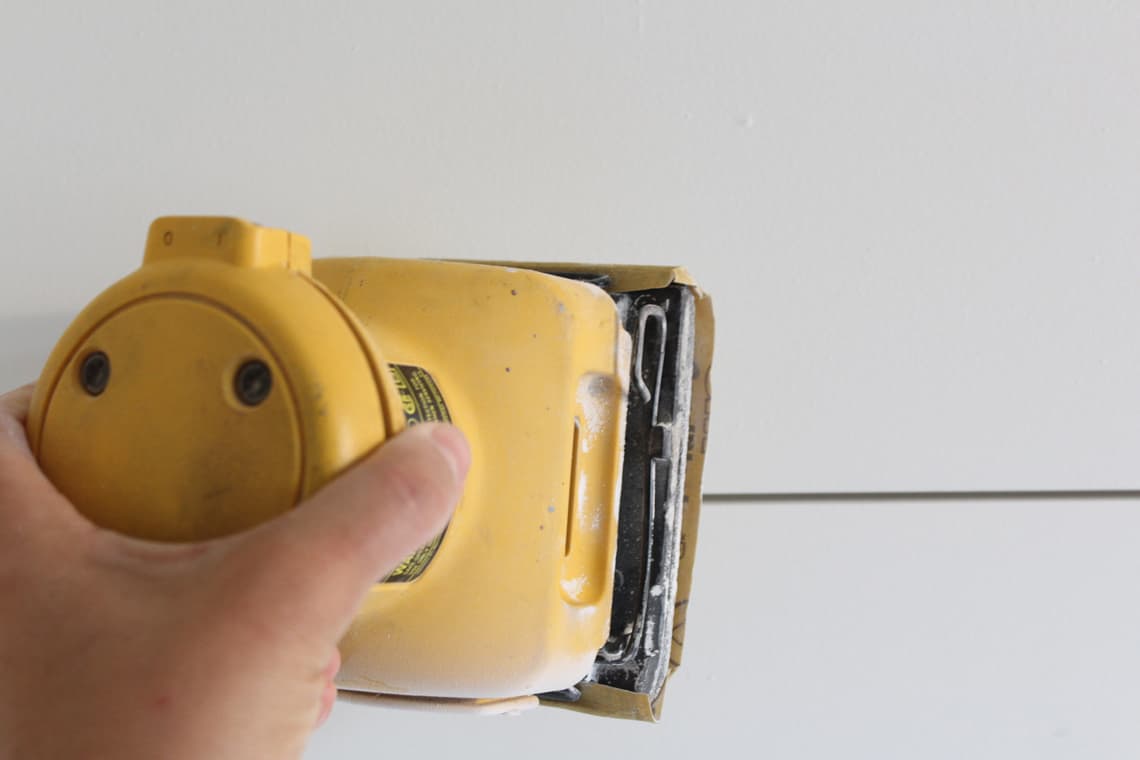
Step 6: Finishing touches: Fill nail holes, caulk and paint
Now for the fun part! Use your wood filler and putty knife (or your finger) to fill each nail hole. This can be a bit tedious so you may want to think about this when you are deciding how many nails to put in each board :) When the filler is dry, sand it down. Next use your paintable caulk in the caulk gun to fill any gaps on either side of the walls and/or ceiling.
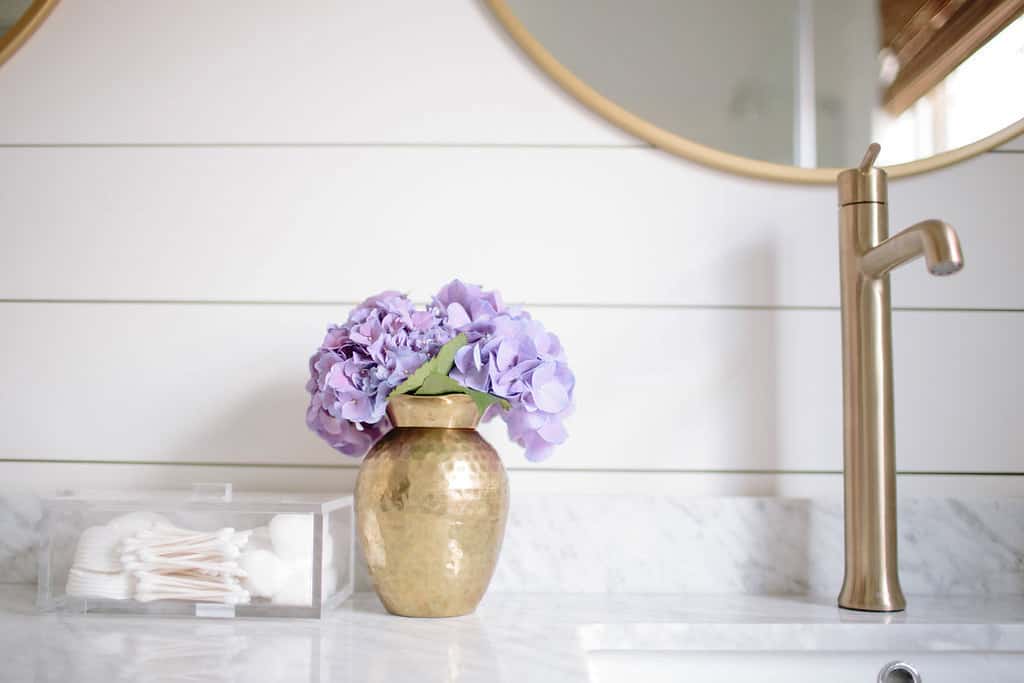
Once everything is dry paint away! Our room is painted Pure White by Sherwin Williams, my go-to true white color!

NOTE: Install and/or replace any light fixtures, outlet covers and furniture now.
And voila!!!!!!!! Now is this awesome or what??? Shiplap makes such a huge impact in every room, I seriously can’t get enough!
So, what do you think? Do you think you would tackle it? If you have any questions or if you see anything I left out please let me know.
Cheers!


Hey there! We just finished Shiplap in our bathroom & love it ! I was curious if you sealed your Shiplap. We have been going back and forth if we should seal it. Help.
Hi Kitty! Thank you so much! We did not seal the shiplap in the bathroom or our kitchen and it’s been fine. Just primed and painted with interior latex :) Hope that helps!!
Great makeover…! This is a very good tutorial for wall decor. You have shared full details for wall decor. I am full of inspired to make this job. It’s made easy. Your masters look awesome for decore your wall. I can’t wait to make this decor. Hopefully, it increases my DIY experience. Really you are so creative. You have added a very good concept. Good job and keep it up. Thanks for sharing your post.
My wife and I recently planned to renovate our master bedroom. but we don’t understand how we do this perfectly. You really did a great job. Your tutorial will definitely help me out of this. Have a wonderful day.
It’s so beautiful. I do have a question abought the faucets. Do you get any extra “splash” with the spigot being in a higher position?
Thank you Sarah! I do get a little extra splash but not enough that it would deter me from buying the taller faucets! I do have to put my face to either side of the faucet when washing but that doesn’t bother me much either :) Hope that helps!
Really nicely done a tutorial. I’ve followed your blog for a few months now, and really appreciate the ideas you share. Thanks!
Thank you so much Rebekah! I really appreciate that and thank you for following along!
https://imageshack.com/i/pmPmDeDQjhttp://www.giftbookings.com/story.php?title=canadian-pharmacy-2
Beautiful. Where are those lights from?
Thanks Chelsea! They are from Lowe’s online. You can find all of the sources in this post! Thanks for reading :) https://simplestylings.com/our-master-bathroom-renovation-reveal/